Baskets are a convenient, inexpensive and attractive way of adding practicality to a bike. Most baskets attach to bikes using leather straps that attach to the handlebars. This method is not secure, and allows the basket to bounce around and rub against the bike’s head tube and fender. Some baskets come with sturdy quick-release hardware that attaches to the handlebars. While this solves the problem inherent to straps, often this attachment method places the basket high above the front wheel, which is less than optimal for bike stability. I’m also not a fan of clamping things to handlebars in general, as this tends to clutter the bars.
For many decades, bikes designed to carry front “randonneuring” bags have utilized specialized hardware designed to keep the bag securely mounted to the front of the bike while also allowing the cyclist to remove the bag quickly and easily. This was common on old French randonneuring bikes, and the approach has seen a resurgence in popularity among randonneuring cyclists. The device is called a decaleur, and is composed of two pieces that interlock: one piece mounts to the headset or stem of the bike, while the other piece mounts to the bag. The two parts interlock to create a quick-release interface between the bike and bag:
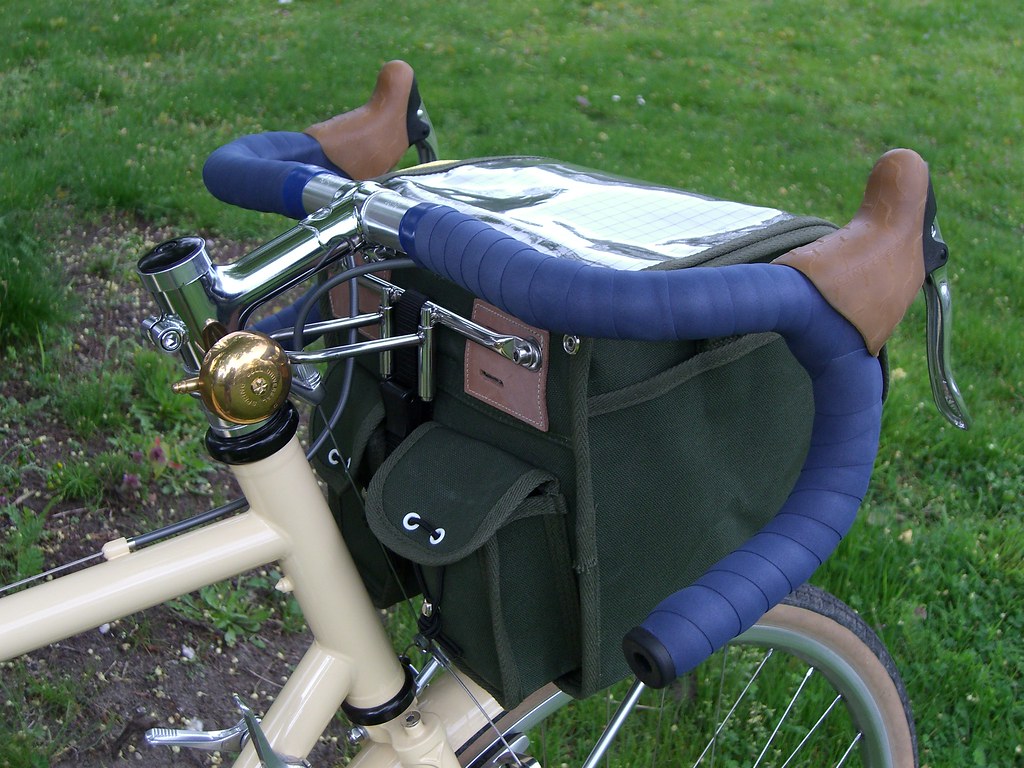
Velo Orange headset-mounted decaleur, securing an Ostrich rando bag. Image courtesy dagoldenberg via flickr.
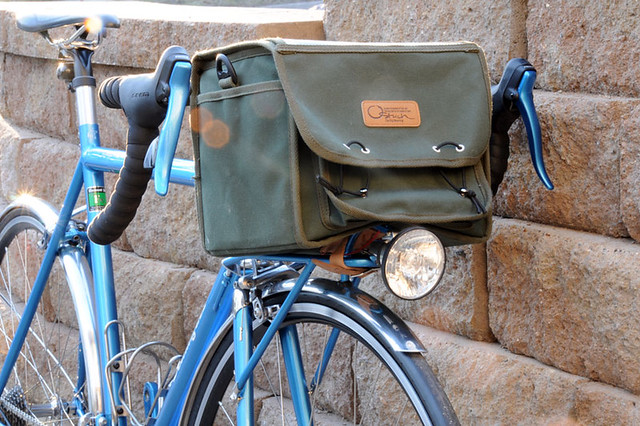
The decaleur holds the bag upright and centered, and a small but sturdy front rack, attached to the bike’s fork, serves as a perch for the bag. The majority of the bag’s weight is supported by the rack. The bag is secured to the rack with a strap:
Ostrich rando bag strapped to a front rack. Image courtesy Vincent Dominguez via flickr.
When my wife mentioned that she wanted a basket for the front of her bike, I began thinking of ways to attach it that not only would be more secure than the handlebar strap method, but would also position the basket as low as possible above the front fender to maximize the bike’s stability. Essentially, I wanted to take the randonneuring bag concept and apply it to a basket. The idea of a decaleur plus front rack appealed to me, but I couldn’t justify spending -100 on a front rack, plus another for a decaleur. Not to mention that my options for a front rack would be limited for this bike, for reasons I won’t go into. Some people find that just a rack alone is sufficient to secure a basket using zip-ties, but I wanted something more integrated. I noticed that many of the old French bikes used additional hardware to secure the front fender, presumably so that the fender could support the additional weight of a headlight without wobbling or shaking loose over time. This hardware was typically just an additional fender stay, as can be seen on this old (and beautiful!) French bike:
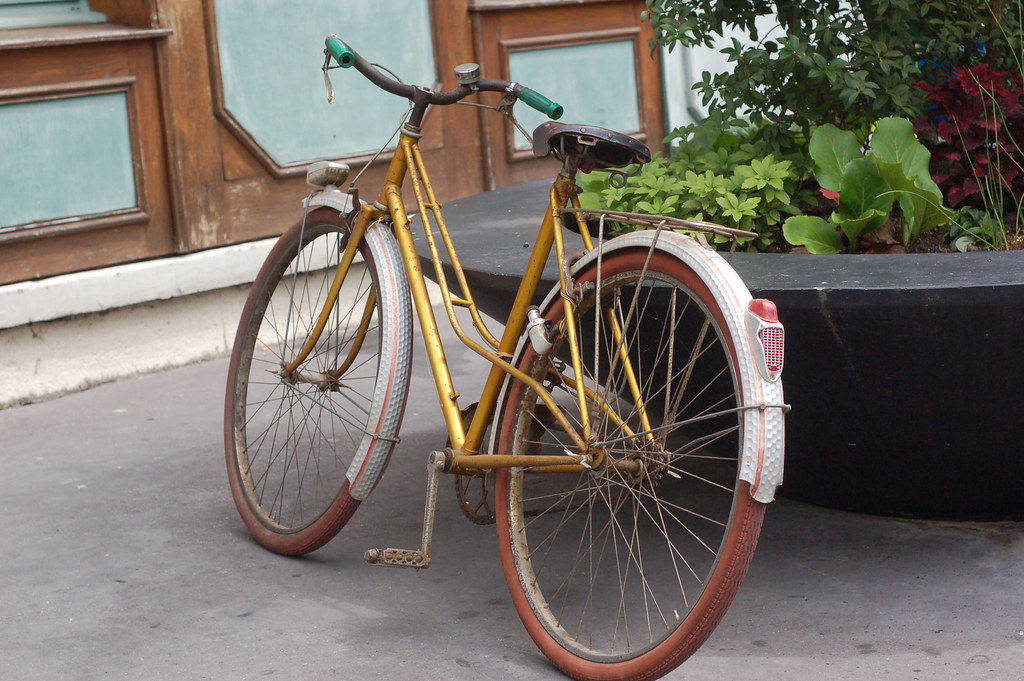
Front fender secured at three points: fork crown and two stays. Image courtesy protorio via flickr.
My wife’s bike has traditionally inspired Velo Orange aluminum fenders, and since Velo Orange happens to sell not only decaleurs but also extra fender stays and hardware at reasonable prices, I decided my strategy would be to use a decaleur in conjunction with an extra fender stay. The decaleur would hold the basket upright and centered, and prevent movement, while the fender stay would prop the basket from below. Total cost of hardware: .
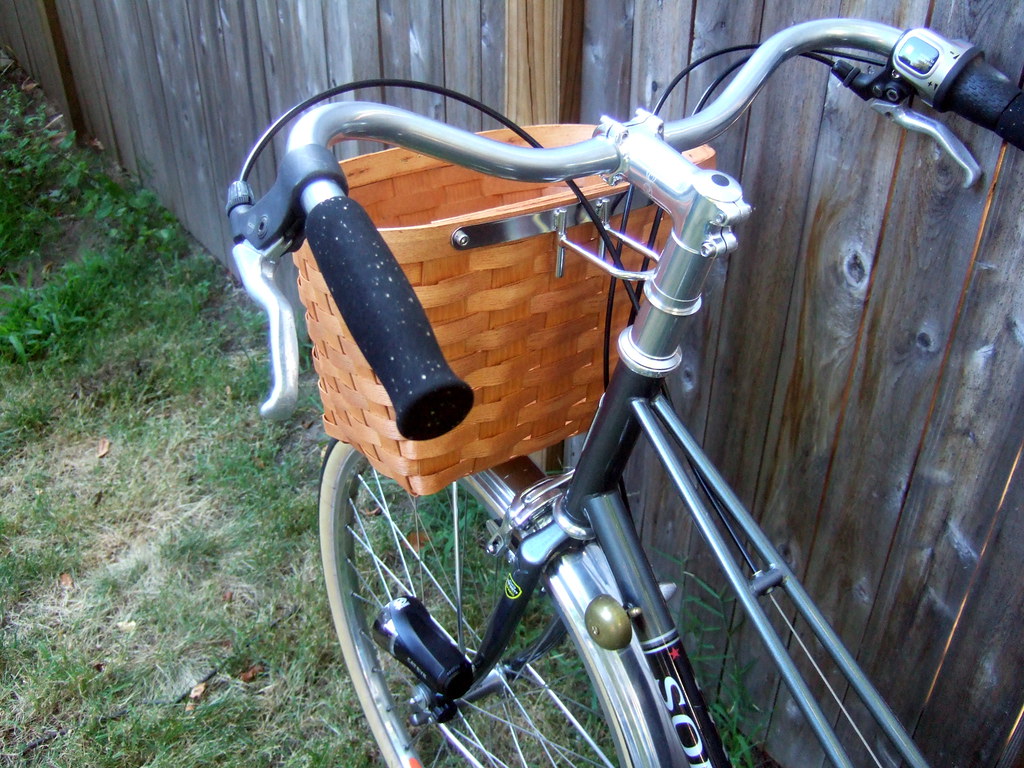
First, I installed the decaleur much the same as if I were mounting a rando bag: I mounted the receiver half to the headset of the bike (in this case, a 1-1/8″ threadless Velo Orange headset). I positioned it midway between the stack of spacers, as that was the position that worked best with the basket we chose for the bike (a Peterboro basket). Then I mounted the bag half of the decaleur to the basket by drilling two 6mm holes in the top lip of the basket, aligned with the two pre-drilled holes in the decaleur. The top lip of this basket is made up of several layered strips of wood and is very sturdy. The 5mm bolts that came with the decaleur were just long enough to fit through the thick multilayered lip and accept the provided nylock nuts with washers.
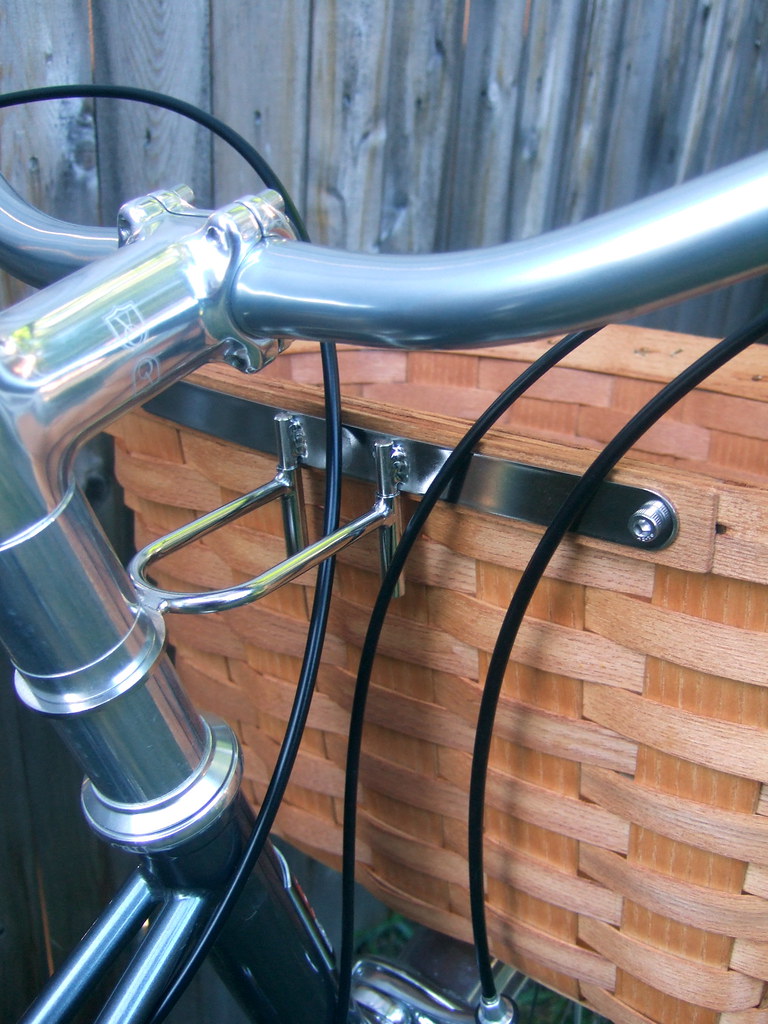
Decaleur mounted to a threadless headset and basket. Note that the decaleur positions the basket well below the handlebars.
Next, I needed to install the additional fender stay. This required some small specialized hardware bits, also available from Velo Orange for a few bucks. Needed were two R-clips, for attaching the stay ends to the threaded bosses or dropout eyelets, and two drawbolts, for attaching the fender to the stay. Fortunately, my wife’s bike has 5mm threaded bosses midway along the fork blades. These are usually reserved for mounting low-rider pannier racks, but in this case, provided a convenient mounting location for the stay. If those bosses weren’t there, no problem– the stay could just extend to the dropout eyelets. I had already used one of the mid-fork bosses to mount a headlight using a home-made mount, but I was able to piggyback both the stay and the headlight mount:
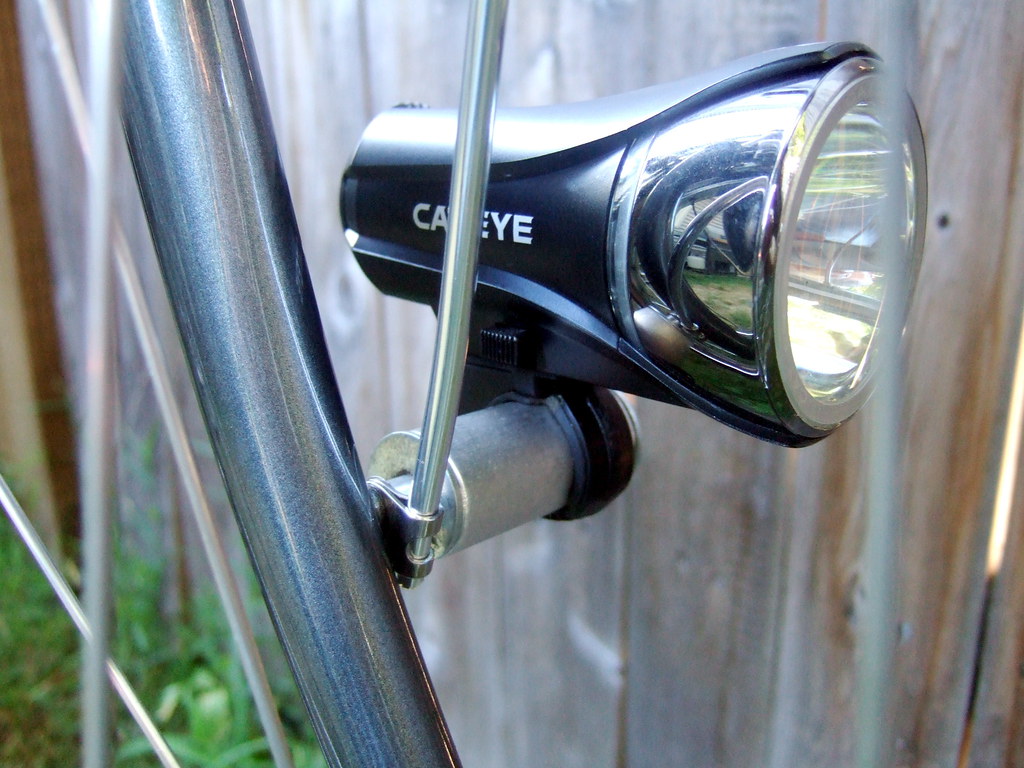
Fender stay attached to mid-fork threaded boss using an R-clip. Headlight mount is piggybacked with the R-clip.
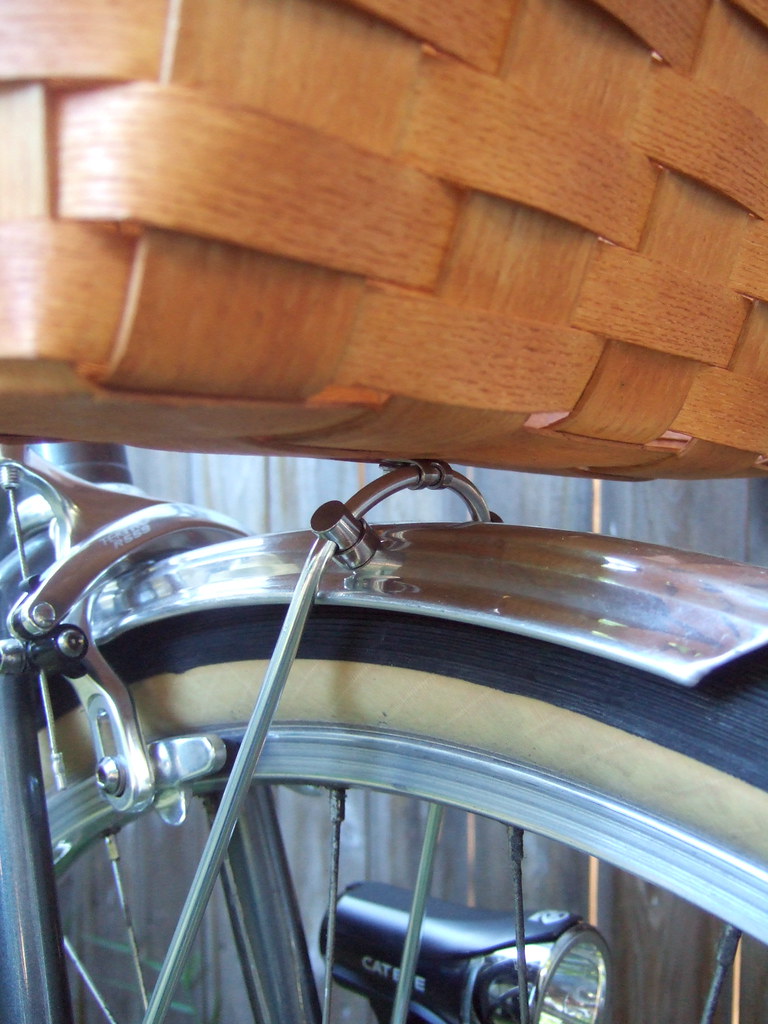
To attach the fender to the stay, two 6mm holes were drilled in the fender on either side to accept the drawbolts. Before sliding all the pieces into place, a third R-clip was placed on the stay, centered between the drawbolts. This would be used to secure the bottom of the basket. Once the stay was in place, a 6mm hole was drilled in the bottom of the basket through two layers of weaved wood, and the basket fastened to the R-clip with a 5mm bolt:
Two drawbolts secure the fender to the stay, while an R-clip centered between the drawbolts secures the basket to the stay.
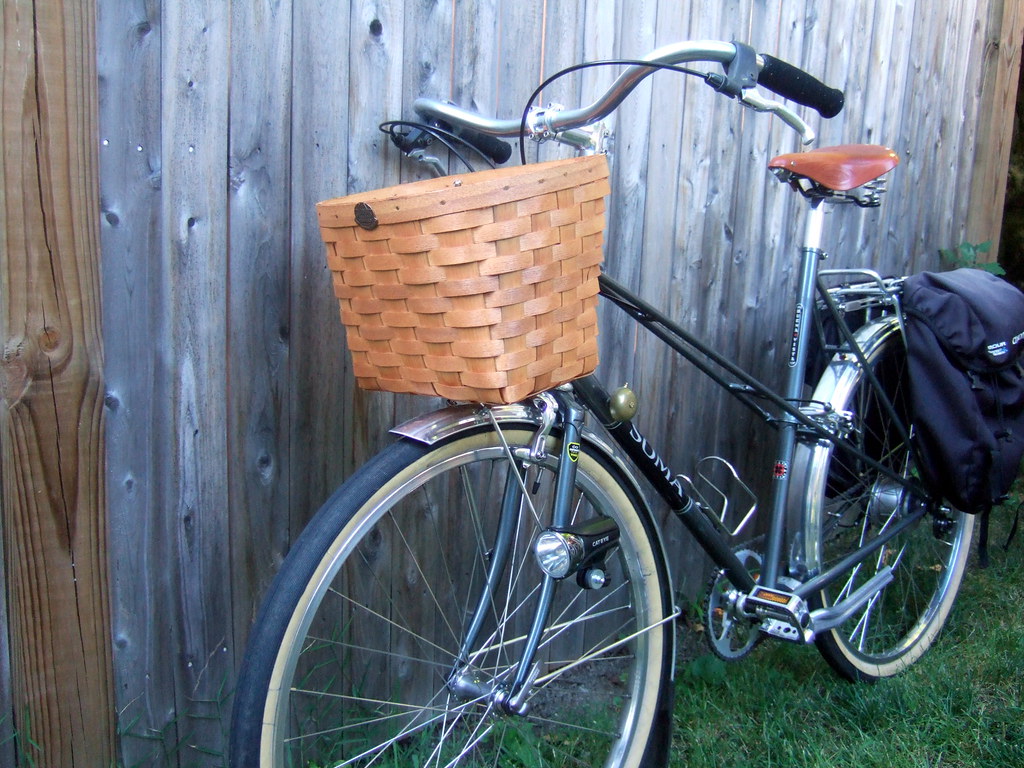
The net result is a basket that is neatly and securely attached to the bike at three points: two points provided by the decaleur along the top lip of the basket, and a third point at the bottom of the basket provided by the fender stay. The three points create a triangulated attachment scheme which eliminates any movement of the basket, and the basket does not rub against any part of the bike. Ideally, most of the load of the basket should be supported along the bottom, while the decaleur serves more to support the sides of the basket from tilting side to side, or back and forth, as the bottom of the basket bends and deforms under load. Since in this setup, the bottom of the basket is supported at only one point near the center of the basket, it remains unclear how well the basket will hold up over time using this method. One way to better distribute the support along the bottom of the basket would be to add a rigid metal (or strong plastic) bar (similar in length to the basket-half of the decaleur itself) along the bottom of the basket. The bar could be attached at three points, the center point also being the attachment point for the R-clip. Initial testing with a light load (e.g., handbag) demonstrated the basket to be sturdy and free of any movement. Time will tell how well the basket holds up with a variety of loads.
A secondary benefit of using an extra fender stay is that the fender itself becomes much more secure than before. Typically, front fenders are attached to the bike at only two points: the fork crown and the stay (just one stay, but occasionally two). By contrast, rear fenders, which are longer and thus require additional attachment points, are usually secured at at least three points: the chainstay bridge and brake bridge, and either one or two stays. Thus, rear fender attachment is at a minimum triangulated, while front fender attachment is not. By adding a front fender stay to support the basket, the front fender attachment becomes triangulated and more secure.
This entry was posted
on Saturday, July 30th, 2011 at 5:43 am and is filed under retronews.
You can follow any responses to this entry through the RSS 2.0 feed.
Both comments and pings are currently closed.