Archive for the ‘retronews’ Category

BRW group meet, ride and workshop: Sunday June 20

Wednesday, June 16th, 2010

Join us this Sunday, June 20th, for our 3rd Boston Retro Wheelmen group meet. This meet is going to be something of a departure from, and expansion of, the first two meets: this one will include Wheelmen’s first group ride, followed by our first hands-on workshop! The theme? Wheel truing! Need your wheels trued? Want to learn how to do it yourself? We’ll provide the truing stand, spoke wrenches and hands-on instruction to turn anyone into a pro in no time. You bring your wheel… and if you don’t feel like using the wheels you depend on daily as guinea pigs, Cycler might have some old salvaged wheels on hand to practice on.

Of course, you might have no interest in learning how to true your wheels. In that case, just come for a leisurely ride, talk shop with vintage bike fanatics, or simply show your your vintage ride (and ogle others’).

We’ll meet starting around 9:30 am at Peet’s Coffee, Harvard Square (corner of Mt. Auburn and JFK streets). There’s plenty of lawn space for the bikes and benches for hanging out while we coffee up.

Around 10:15 we’ll depart on a leisurely ride heading out of the square toward Fresh Pond, maybe working our way around the pond or around nearby Mt. Auburn Cemetery, and return to Peet’s around 11:15 to re-fuel and catch up with anyone else who wants to meet just for the workshop.

Back at Peet’s, we’ll head to Cycler’s house, just a few blocks away. Cycler has graciously offered her back yard for the wheel truing workshop. We’ll wrap up around 1:00.

Looking forward to seeing you and your vintage rides!

Installing fenders on a road bike not designed for them

Saturday, June 12th, 2010

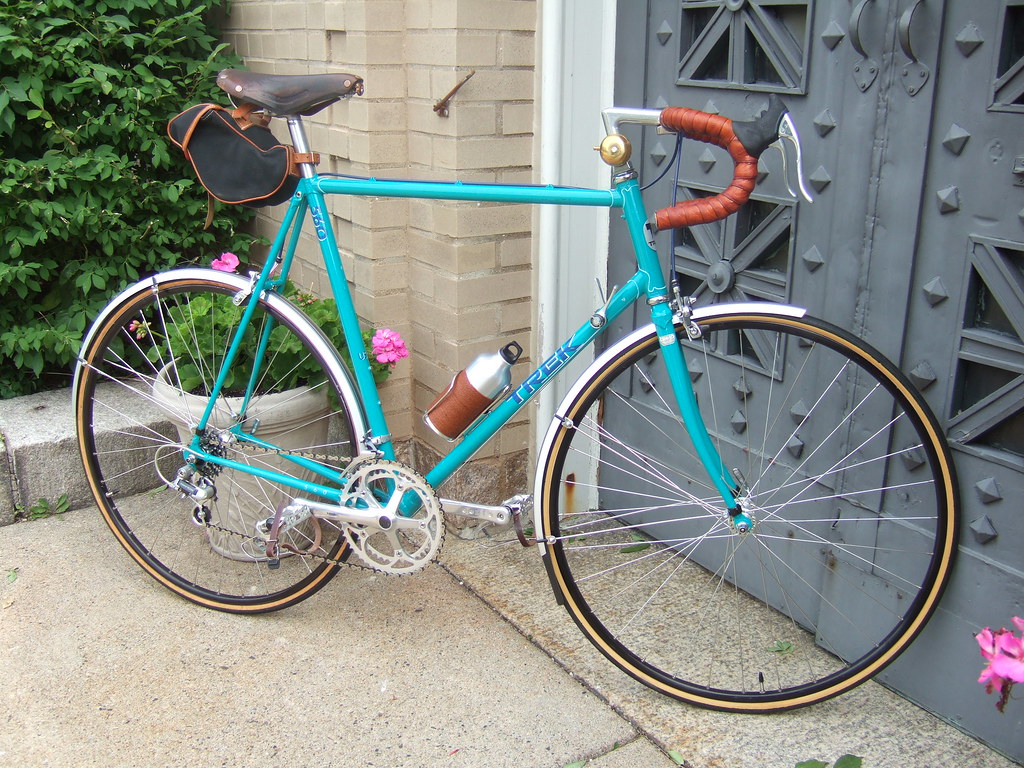
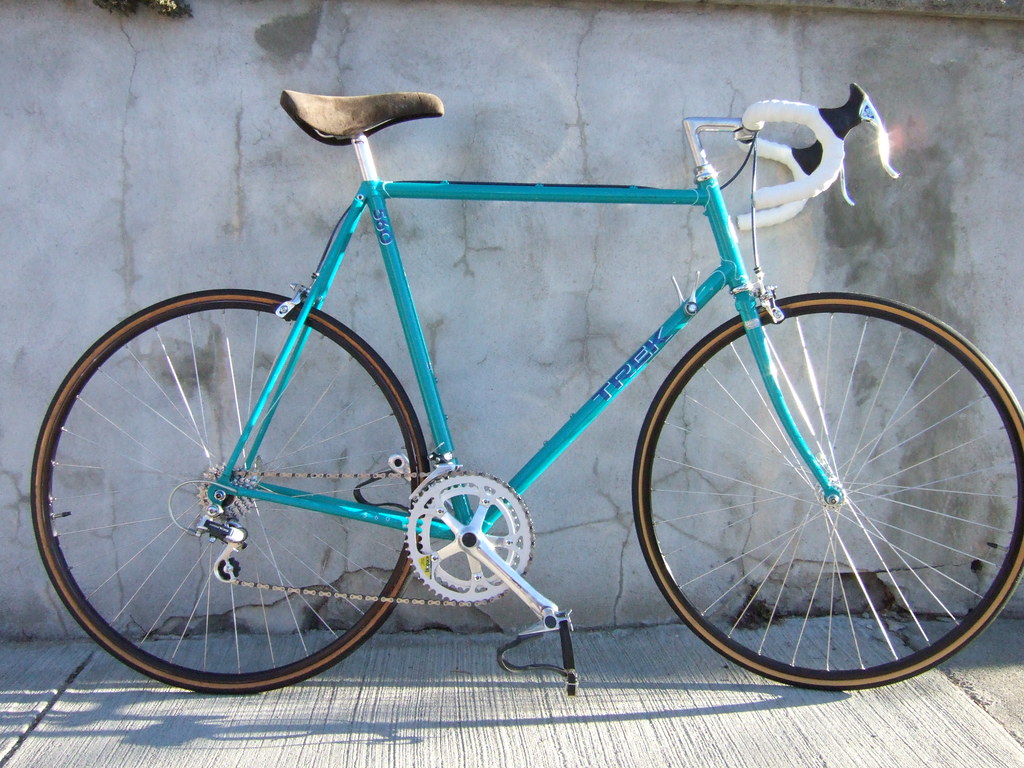
Most bikes are designed with provisions for installation of  “extras”, such as racks, fenders, and bottle cages.  This usually means small threaded bosses brazed onto the frame at carefully chosen locations.  Touring bikes, which are designed to be ridden long distances loaded up with everything the rider needs to be self-sustaining for days, weeks, even months, usually contain braze-ons for just about everything:  racks front and rear to hold camping gear, fenders to keep the rider and bike clean in wet weather, frame pump, multiple bottle cages, etc.  However, not all bikes are designed to accommodate all types of accessories.  For example, a city bike may not have threaded bosses for bottle cages or braze-ons for a frame pump.  Conversely, a racing bike will have provisions for at least two bottle cages, and most likely a frame pump.  But since racing bikes are designed to be as light and fast as possible and not carry luggage, they usually lack provisions for racks and fenders.  I have such a road bike, a 1988 Trek 560:

But I’m also a firm believer that all bikes should have fenders, and I was determined to get this bike appropriately clad. When I started researching my fender options, I found that some companies like Planet Bike and SKS sell ready-made solutions for bikes not designed for fenders, including “clip-on” fenders.  However, all of these designs leave something to be desired. Either the mounting schemes seem weak or crude, or the fenders lack “full coverage”, i.e., they don’t span the full arc length of a standard fender and only provide limited protection from water spray. I wasn’t pleased with any of these options.  So, I decided to “force” fit a conventional set of full-coverage fenders onto my bike.

After measuring the clearances at critical locations on my bike, I decided that the bike actually could fit standard road-sized fenders, i.e., 35mm wide fenders designed for road bikes with tires up to 28mm wide.  The tires on my Trek are 25mm wide, and there is enough clearance under the brake calipers for the fenders to fit.  What the bike lacks is threaded eyelets on the dropouts, and a chainstay bridge. Examples of these are shown below:

Double threaded eyelets on the rear dropout of this touring bike provide for installation of a fender and a rack.

 Chainstay bridge on this bike supports the bottom end of the rear fender.

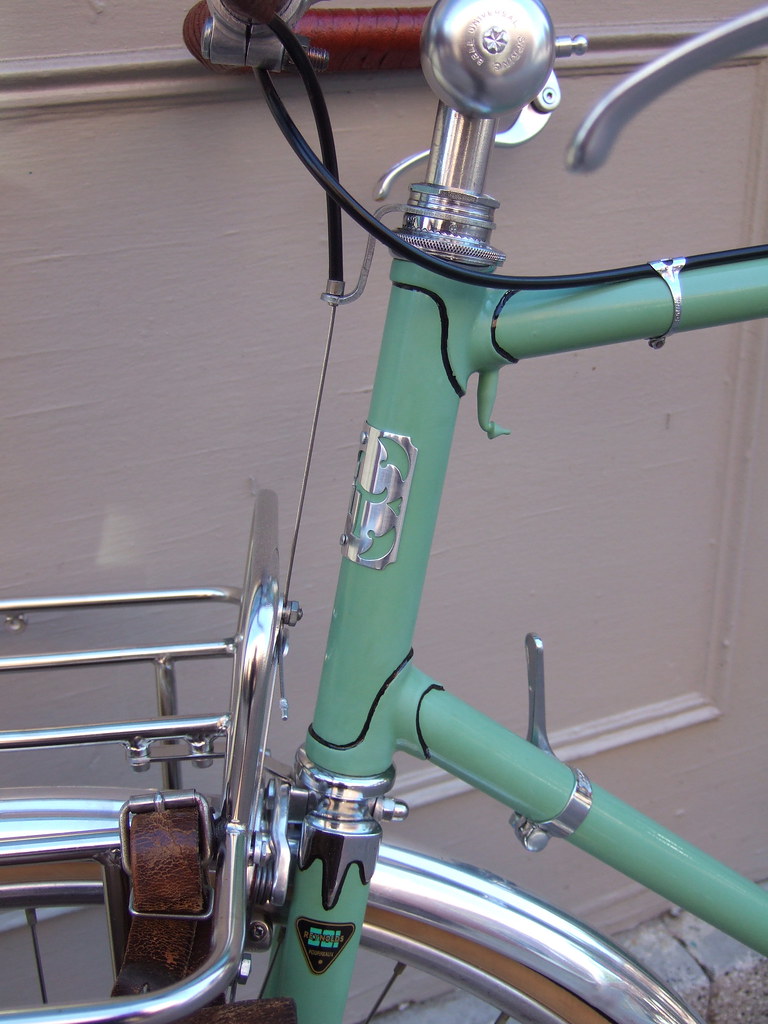
 No chainstay bridge on the Trek…

…nor threaded eyelets!

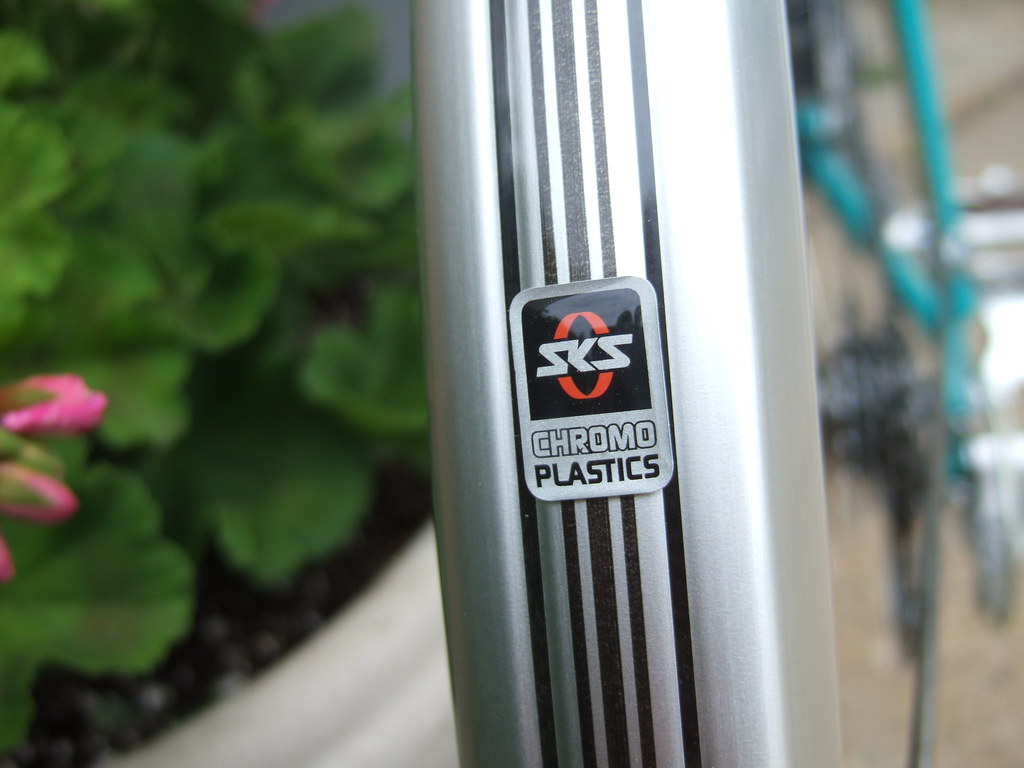
The chainstay bridge is necessary to support the front, or bottom, end of the rear fender, and usually contains either a threaded boss or a hole drilled through it to accommodate a bolt with which to anchor the fender.  So, I was going to have to fabricate solutions to these two deficiencies. I’ll return to this later.  For now, my next step was to choose a set of fenders.  I wanted a set that would provide full coverage but also have a look befitting the bike. The Trek 560 has a nice lugged steel frame of classic proportions, but is not quite vintage.  I felt that fender offerings from my two favorite brands, Honjo and Velo Orange, were a little too classic for this bike.  I wanted to find a set of fenders that had a clean yet modern look that would complement the Trek’s contemporary black anodized rims.  Planet Bike has a nice line of fenders called Cascadia, which are available in a nice satin aluminum “chromoplastic” finish.  SKS has a similar chromoplastic line of fenders.  After reading reviews of both and finding a fantastic deal on the SKS fenders, I opted for the SKS. As a side note, the screaming deal I got was from an online seller in the UK (due to the weakening pound).  The SKS fenders sold there are actually nicer than the ones sold in the US– they include a really large front mudflap! So I got the nicer UK version for less than the US version.

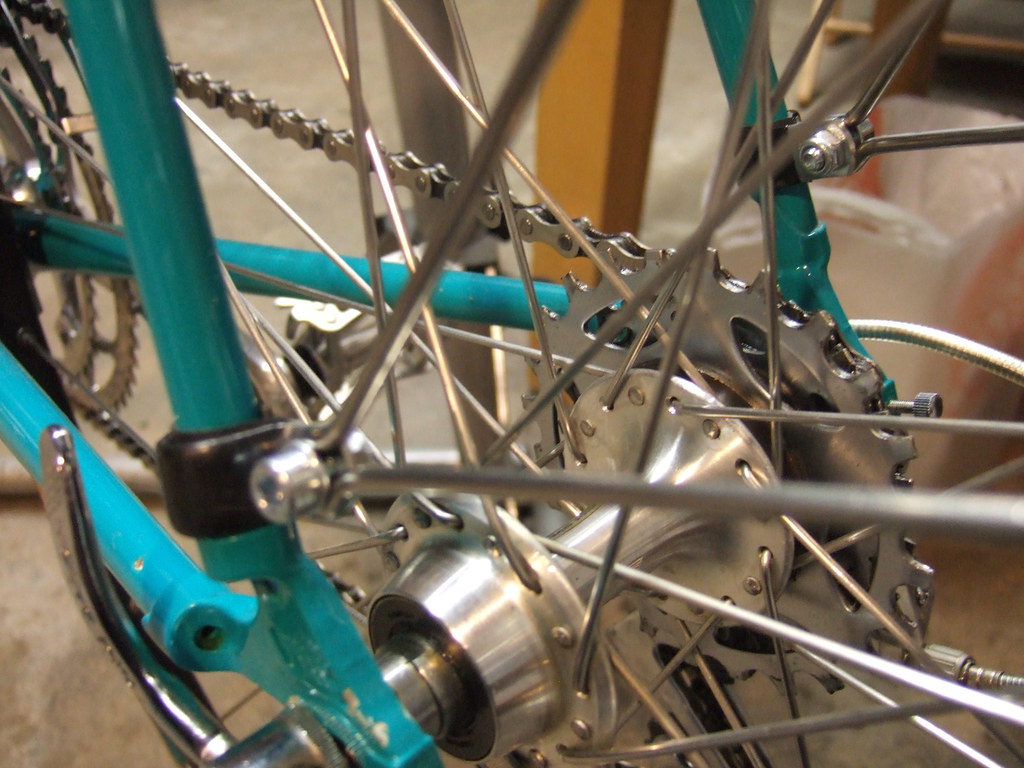
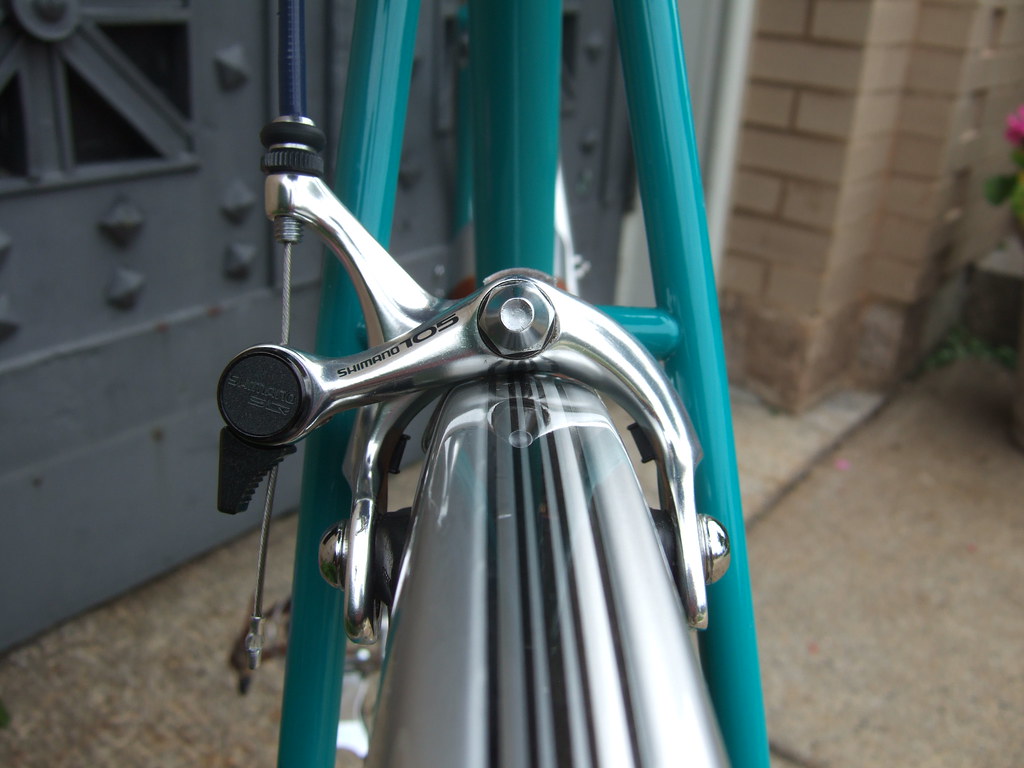
So, back to solving the problem of not having threaded eyelets or a chainstay bridge.  Of these two obstacles, the eyelets are the easier to overcome:  P-clamps are a widely used and proven substitute for eyelets.  They are inexpensive, and stocked by most bike shops.  They wrap around the fork and seatstays, and the fender stays bolt to them.  You can buy them with a rubber coating so they won’t mar your bike’s paint.  After measuring my fork blades and seatstays, I determined I needed 9/16″ clamps for the front, and 3/8″ clamps for the rear.

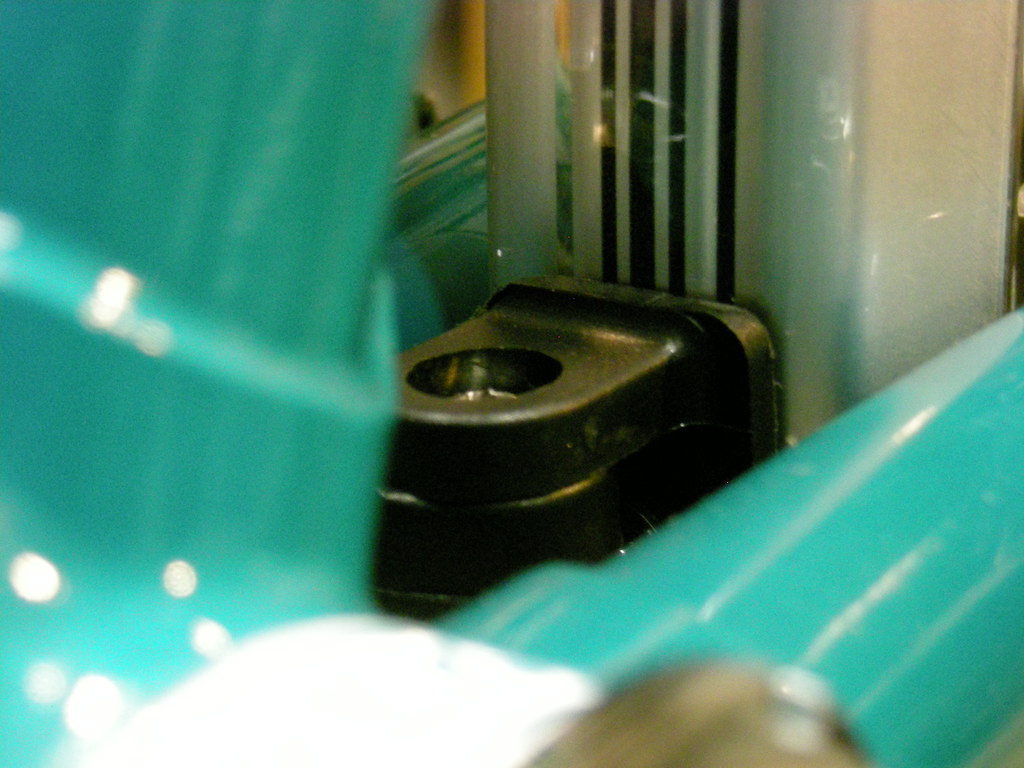
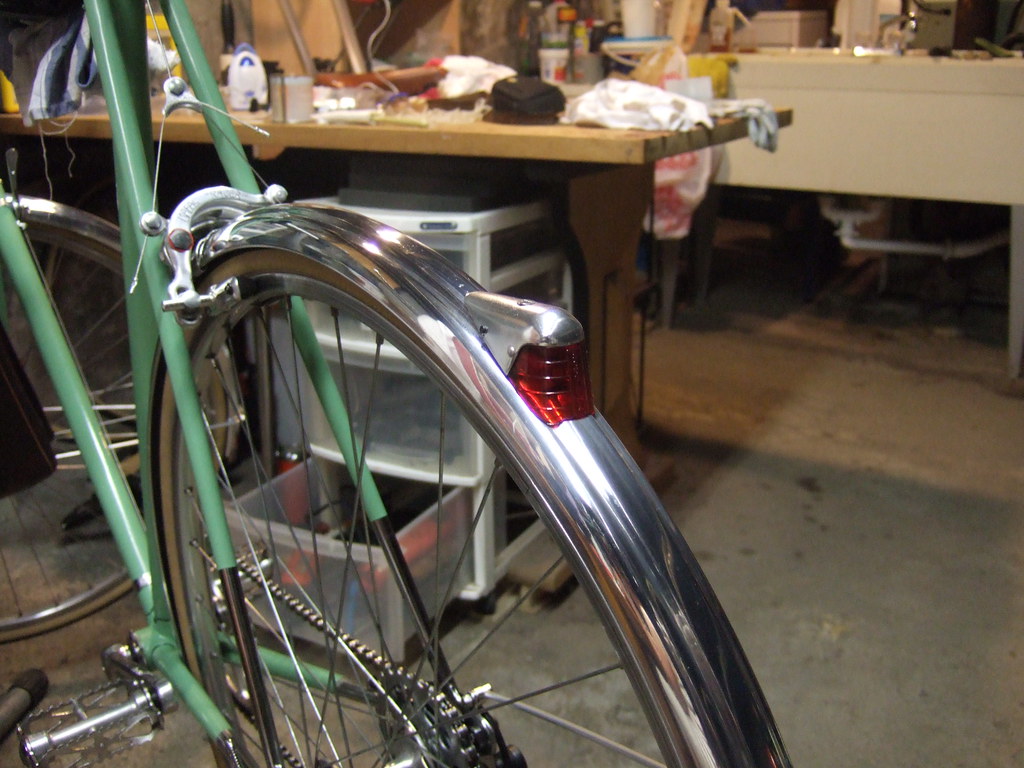
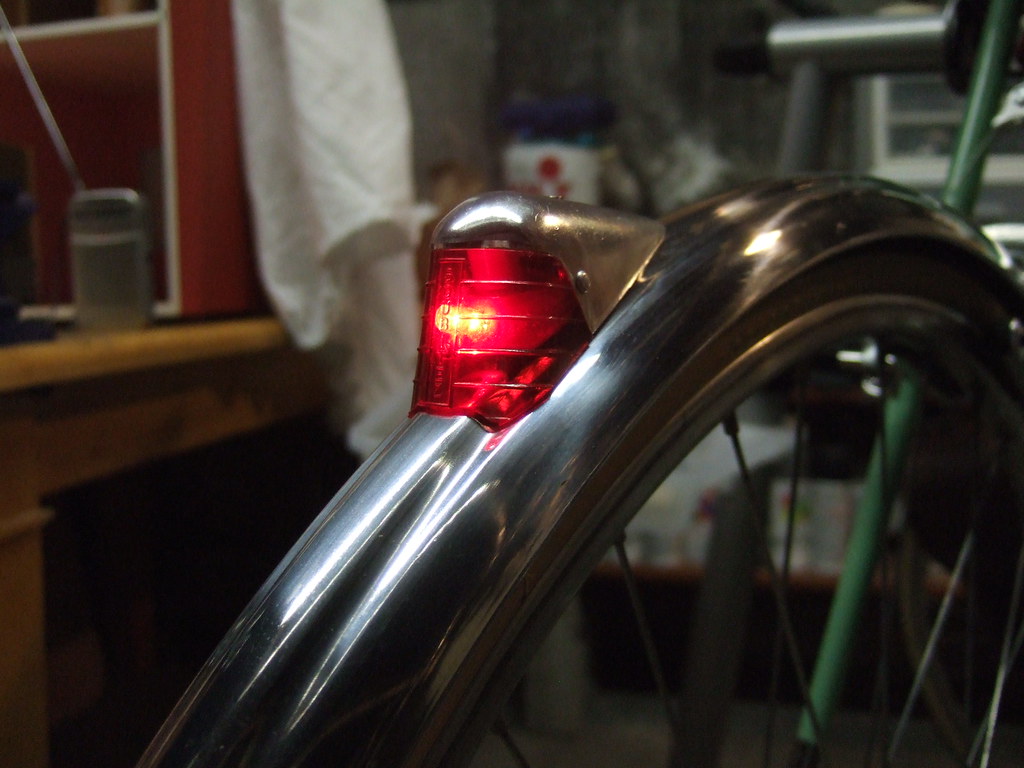
The lack of a chainstay bridge proved more challenging. At first I thought I could use two P-clamps, one around each chainstay, with a hollow tubular aluminum spacer spanned between them.  In effect, this would create a bridge.  But this seemed awkward and cumbersome.  Next, I thought I might be able to use just one P-clamp around one of the chainstays (probably on the driveside chainstay, which would be less noticeable, hidden by the chainring).  Then I could make a small metal “L” bracket to connect to the P-clamp on one end and to the fender on the other.  But then, I imagined it would look hacked and crude at best.  Then I thought about how LED headlamps and taillamps are mounted, and I realized that it’s often a variation of the P-clamp method.  The difference being, that attached to the clamp is another plastic piece that attaches to the light and pivots to allow it to be properly aimed.  Hmm… could a headlamp mount be the perfect “adapter” piece to secure the rear fender via the chainstay?  It seemed like it could look very clean if done right.  As it happens, I had amassed a stockpile of surplus mounting hardware from all the LED lights I’ve had over the years.  Time to raid my parts boxes!  I found a seatpost mount from a Planet Bike blinky, and discovered that it fits almost perfectly around the chainstay (it was a little big, so I cut a piece of an old inner tube to use as a shim).  I trimmed the piece that attaches to the light, and this is what I ended up with.

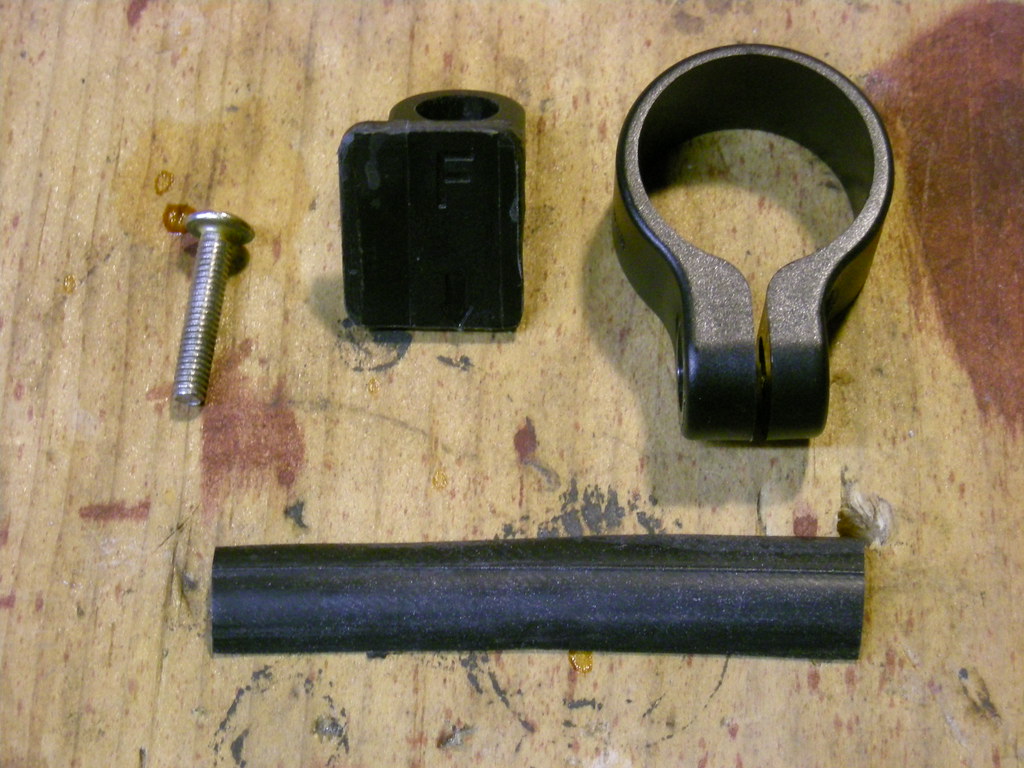
I lined the front of the fender up with the trimmed piece that normally attaches to the light, drilled a hole and screwed it onto the fender.  Then I screwed the other end into the circular seatpost clamp.  Here it is in place:
You can see from the pictures that the pivoting part came in handy, since the fender is not at a right angle with the chainstay (the top photo shows this the best).  The mounting system allows one to “dial in” a perfect alignment with the fender.
With that obstacle overcome, all that remained was to attach the supplied fender stays according to the instructions, except that instead of attaching them to eyelets, they were attached to the P-clamps:
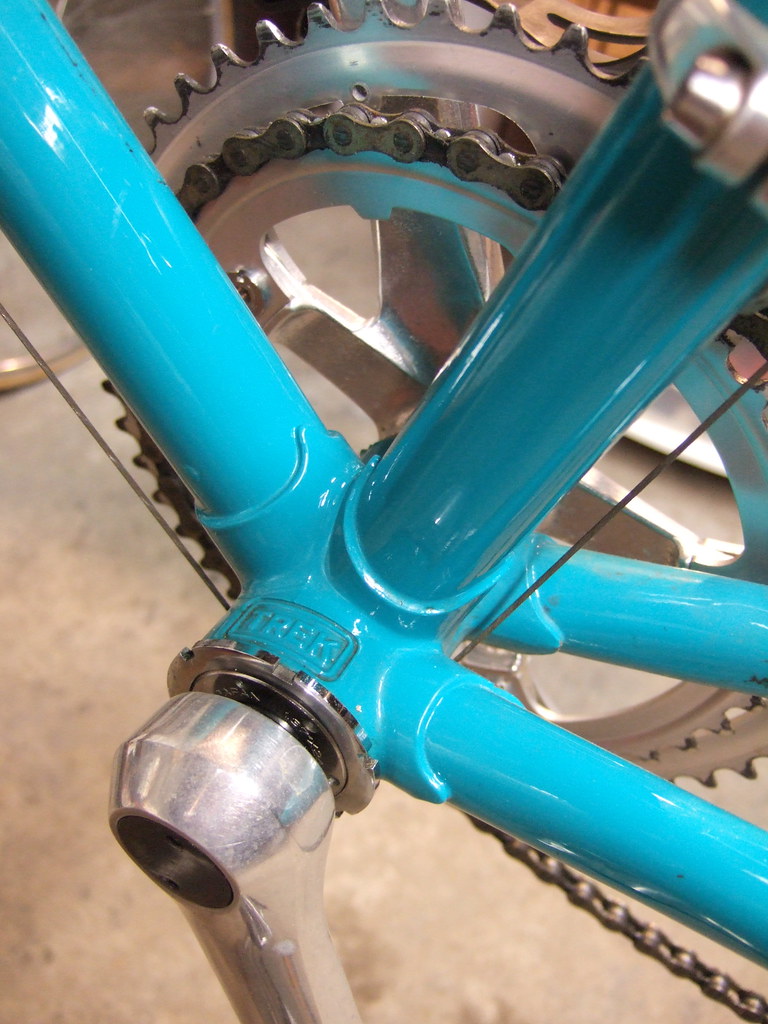
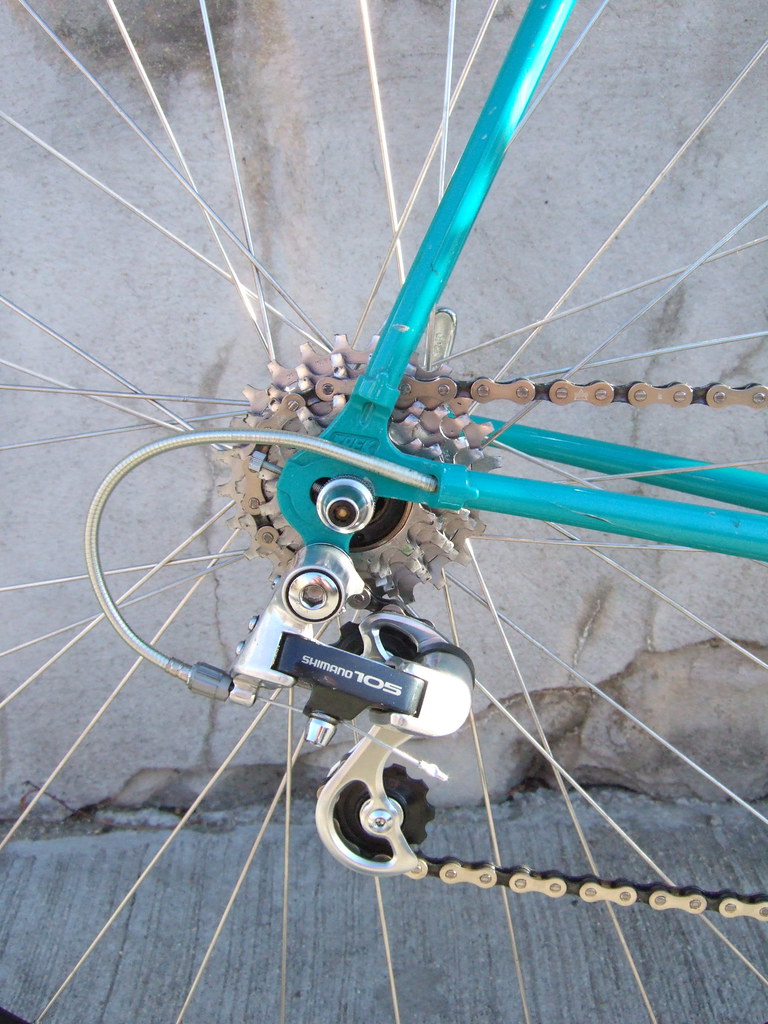
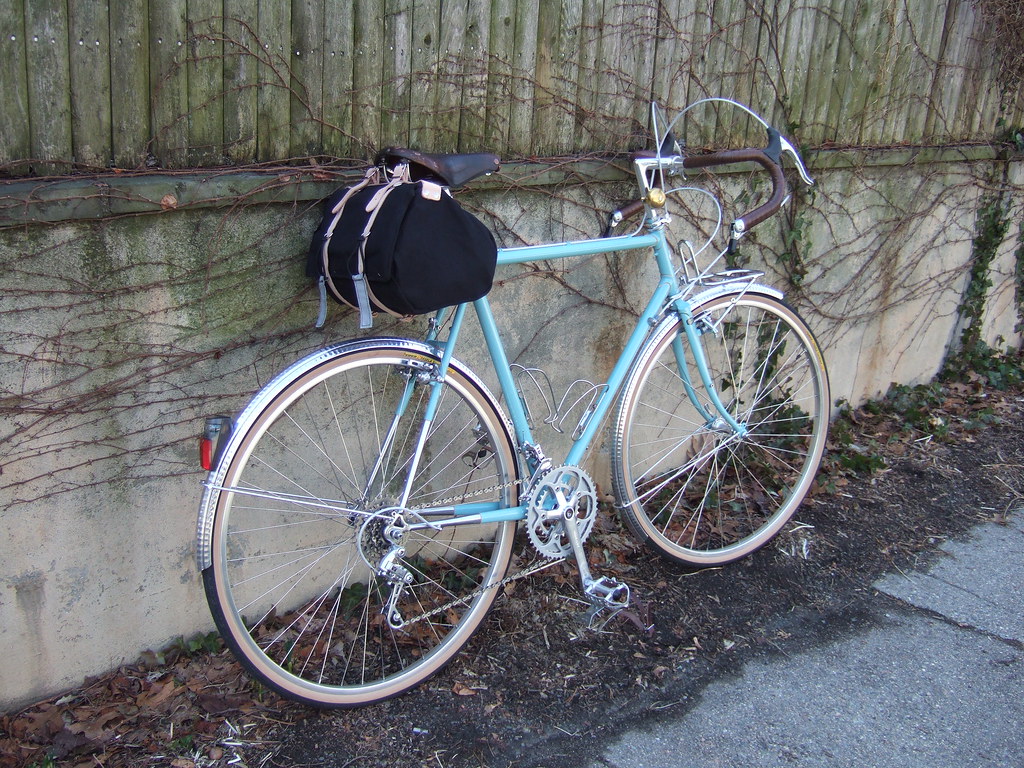
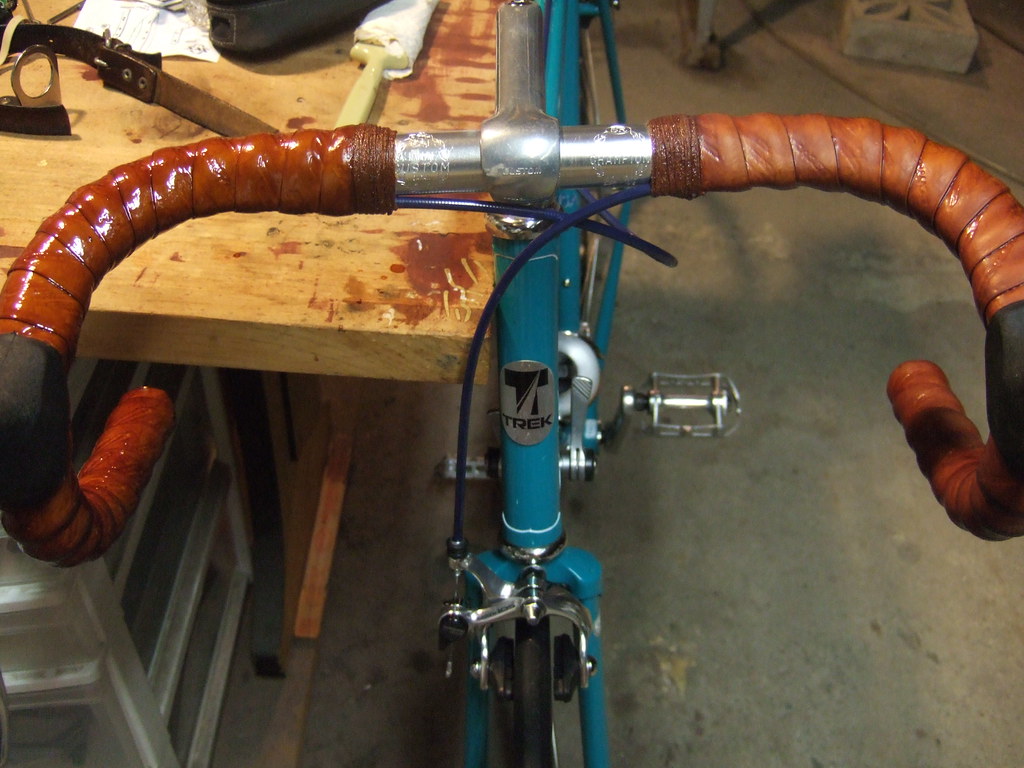
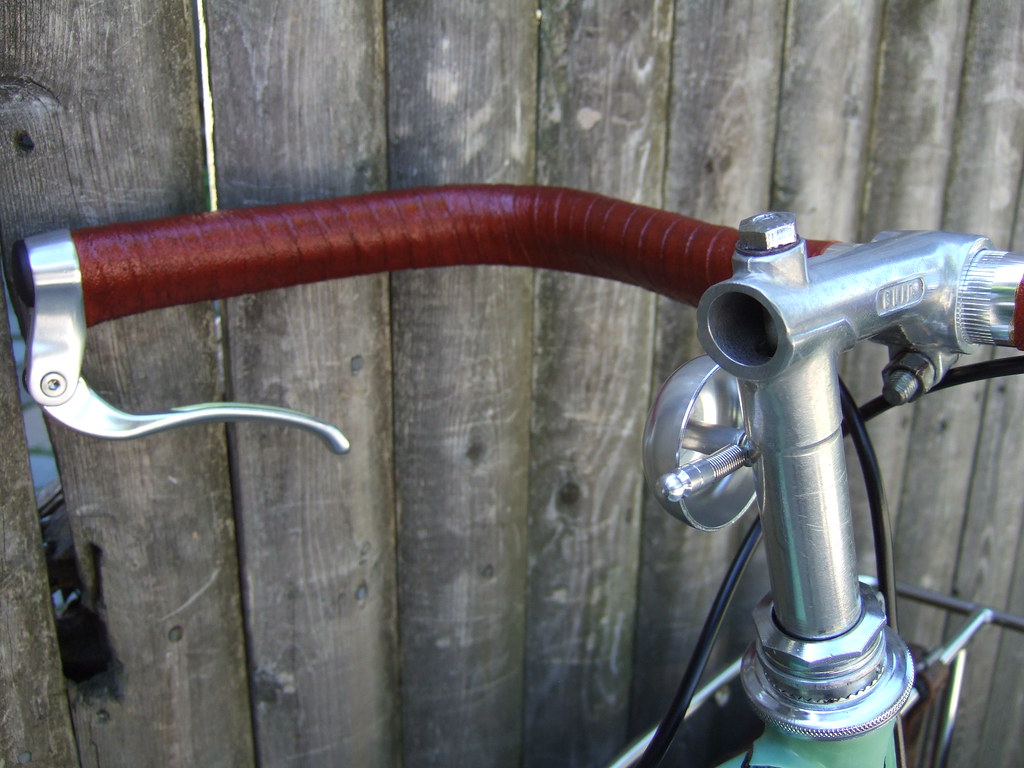
Here’s the finished installation, as well as some purely gratuitous shots of the bike:

Darkening leather accessories with Proofide

Wednesday, June 9th, 2010

Most people who own a leather bicycle saddle know they’re supposed to treat the leather with a conditioner and waterproofer to soften and preserve the leather.  Brooks makes a big point of this and markets “Proofide”, their proprietary paste of a blend of various waxes and oils.  They also make a point of not over-applying their product: saturating the leather can soften it too much and make the saddle too saggy.  Perhaps that’s one of the reasons they sell it as a paste and not a liquid. In fact, on the burnished side of the leather (the side you sit on), the paste doesn’t even penetrate (burnishing seals the surface of the leather and gives it that smooth feel).  You apply it like a polish, then buff it out.  Since the paste doesn’t penetrate the burnished side of the leather, it doesn’t usually affect the color (soaking oil into leather darkens it considerably).

I recently bought a Minnehaha saddlebag for my Shogun touring bike.  Like many saddlebags, it has leather straps, but they are natural colored, very light:

I also purchased a new Brooks saddle in “honey” color for the same bike (not the saddle in the above photos), and wanted to darken the leather on the Minnehaha saddlebag to match. I tried using neatsfoot oil, since that’s generally regarded as the oil of choice for conditioning leather.  However, after testing neatsfoot oil on a small section of leather and finding that it does indeed soak in and darken the leather, I later discovered that the color darkening was only temporary.  Within a couple of days the leather lightened up again!  It was as if the neatsfoot oil evaporated (a plausible idea, because I don’t know how much of a solvent base there is in the neatsfoot oil I bought).  So, I wanted to try a more permanent treatment.  I rubbed in some Proofide paste, and found that it darkened the leather a little bit, but not as much as I wanted.  I wanted a dark honey color.  I wondered if “forcing” more Proofide into the leather would make the leather darker.  So, I decided to pre-heat the leather, so the Proofide would melt upon application.  My hypothesis is that the melted Proofide would soak into the leather, then as it cooled down again, it would again become a non-volatile solid (it wouldn’t evaporate).  To do this, I simply placed the saddlebag in the oven at 200 degrees for a few minutes.  Then, I used an old toothbrush to apply the Proofide to the hot leather.

Proofide has roughly the same consistency as soft butter, and it melts upon contact with the hot leather much as butter does on a hot skillet.  Wow!  The leather soaked up the melted Proofide like a sponge! Compare the two treated straps on the left with the untreated strap on the right:

I found that the leather cooled down very quickly, and I had to keep returning the saddlebag to the oven every 5-10 minutes to reheat.  Also, after a while I ditched the toothbrush in favor of just using my finger to spread the Proofide (I wore nitrile gloves the whole time). Here’s the finished bag:

The color is very close to Brook’s “honey”, and so far, it hasn’t lightened up since applying the Proofide two days ago. I’m hoping the color is somewhat permanent.  In case you’re wondering how much Proofide this small amount of leather soaked up, consider that this 4 oz tin was new before I started:
The last tin of Proofide I had was good for at least a half-dozen applications on leather saddles, applying to both the topside and underside of the leather.  Here, I’ve used up half the tin on a few straps! Given the premium price of Proofide, I think the next time I need to stock up I’m going to try Velo Orange’s new leather paste, at about one quarter the price of Proofide.

And in case you’re wondering whether so much Proofide on leather is potentially damaging, well, I am inclined to think not, at least in this case.  In the case of a saddle, which has to support a lot of weight, I would agree that too much Proofide may overly soften the saddle, compromising its ability to properly support the weight of the rider.  But since saddlebag straps don’t have much of a structural role, I doubt excess oil/wax can cause any harm.  At any rate, the straps that attach the bag to the saddle are replaceable should they become weakened.

Another idea for the adventurous is to experiment with wood stain.  Wood stain of various colors can be mixed with Proofide (maybe melt the Proofide to mix with stain, then let harden again).  This might result in even darker tones to match darker saddles.

Lastly, here’s the saddlebag along with the new Brooks saddle, in place on the bike:

An essential tool for every velo restoration: steel wool!

Monday, June 7th, 2010

As the number of bikes that I restore continues to climb, I’m finding that there are a few key workshop tools that I use over and over again to the point where they have reached “essential” status.  In addition to the 5mm and 6mm hex wrenches, the 10mm, 12mm, and 15mm box wrenches, and various pliers and screwdrivers, there is one tool that particularly stands out:  steel wool. In my workshop, steel wool has achieved all-star status, up there with duct tape and WD-40.

Steel wool comes in several grades of coarseness, denoted by a number:  #4 is the most coarse, and smaller numbers denote decreasing coarseness.  After #0 comes #00, #000, and finally #0000, the finest steel wool readily stocked by hardware stores (there may be finer, but I haven’t found them).  To give you an idea of the relative courseness, #0000 is similar in roughness to a dry eraser, only softer and more compressible, like a ball of cotton.
At its basic, steel wool is an abrasive material for removing dirt, grime, rust and other types of oxidation from surfaces.  In its most common role in my workshop, it is a polishing agent, used to polish up just about every aluminum and chrome surface:  hubs, rims, derailleurs, handlebars, stems, seatposts, cranks, chainrings, pedals, shifters, and even ball bearing cups and cones.  The advantage of steel wool is that it is soft and compressible, allowing it to conform to uneven surfaces and work its way into nooks and crannies, something sandpaper can’t do.  Generally speaking, I use #000 and #0000 steel wool for most projects, and I use a variation of the “wet sanding” method exclusively:  I liberally douse the steel wool with dish soap and use lots of water during sanding.  The dish soap acts as a lubricant which allows the wool to work easier and to get into tighter spaces.  It also helps remove grime!  Below are some examples of bike components after polishing with steel wool (sorry, but I don’t have any “before” shots for comparison).  This quick-release skewer was full of surface rust before polishing:
This aluminum hub was chalky grey-ish white with oxidation before polishing with steel wool:
But in addition to its routine use as a metal polish, I’ve discovered more unconventional uses for steel wool.  For example, when my Jeunet frame came back from the powder coater’s, I was sorely disappointed with the finish:  it was so high gloss, it looked like it was wet-dipped.  But worse, the powder coater had made a critical mistake and applied too much powder around the seat cluster.  This caused two very thick runs to form, flowing down each seatstay.  These runs were a few millimeters thick and several inches long.  I had already had words with my powder coater over other issues, and at this point I wasn’t going back to demand a do-over; I wasn’t going to return to this guy ever again.  I needed to devise a way to remove the runs, or else just give the frame to another powder coater and have everything redone (at significant cost).  With nothing to lose, I decided to file down the runs using a grinding wheel, followed by successively finer and finer grit sandpaper, and finishing with #0000 steel wool.  I very careful progressed through this sequence, and the runs were removed to my satisfaction.  But, I was pleasantly surprised by an unexpected outcome:  the #0000 steel wool removed the fine scratches from the sandpaper, but left a nice, dull, matte lustre to the finish.  It was no longer “dripping wet” looking, but soft and matte.  I was elated!  Wasting no time, I proceeded to test the effect of steel wool on other parts of the frame, and three hours, several wool pads and about a tablespoon of dish soap later, I had managed to dull the entire frame and fork. I was amazed by the transformation that steel wool had on the powder coat:  it had removed the high gloss, leaving behind a semi-matte lustre which seemed perfect for a bike of this vintage and style:

So, steel wool seems to have two opposite effects, depending on the material on which it is being used:  for unfinished metal, it polishes it and removes layers of oxidation; for painted surfaces it removes any glossy finish.

Intrigued by this dichotomy, I asked what would happen if I used steel wool on this glossy shellacked handlebar tape:

Would it remove the high gloss finish of handlebar tape that’s had many coats of shellac?  Or would it polish it further?   Believe it or not, that shellacked bar tape was originally white:

I wanted to coat the white cork tape on this bike with amber shellac to produce a deep, red-brown leathery color.  Cork tape doesn’t absorb shellac as readily as cotton, so the first few coats came out light amber, too yellowy for me.  But once I applied enough coats to achieve the color depth I wanted (about six), an undesirable side effect had emerged:  a high-gloss, glaringly plasticky appearance that just didn’t look right.  So, in came our old friend steel wool, along with plenty of dish soap:
The effect was pretty dramatic.  I don’t know if it’s captured in the picture below, but after treatment, there is a subtle, natural looking variegation that looks strikingly similar to leather:
Let’s contrast before and after.  On the left in the picture below is before dulling with steel wool;  on the right is after. I think the look after treatment is more subtle and natural appearing.
So, I’ve used steel wool to polish up old components, dull a frame’s powder coated finish, and dull shellacked bar tape.  It truly is the velo restorer’s duct tape.  

Vintage bicycle taillight LED retrofit: Part Deux

Friday, June 4th, 2010

In an earlier post, I documented the retrofitting of a vintage French bicycle taillight with a modern battery-powered LED.  In that post, I hadn’t yet developed a solution for mounting the customized taillight to the fender.  This post documents this final step, and shows the final product.

The 1950s Soubitez taillight shell has a single hole for mounting to an internal support assembly, which itself mounts onto the fender.  That assembly was missing from my taillight, and I would have had to remove it anyway for the LED retrofit.  So, I had to fabricate a small bracket, one end of which would attach to the fender, the other end of which would attach to the taillight via the provided screw hole.  The bracket had to be small, yet strong, to prevent the taillight from wobbling.  An added challenge was making the taillight easy to remove and re-attach for battery replacement.

For the bracket, I chose a small tang of hardened stainless steel.  This originally came with a set of SKS fenders that I purchased for one of my road bikes (another future post), but I knew I wouldn’t need it for that project, so I hacked it to work as the taillight mounting bracket.  It is very strong and does not easily bend:

On the taillight end of the bracket, I glued on a 4mm stainless steel nut. This was essential for being able to screw the taillight onto the bracket, since the bracket is completely concealed inside the taillight.

To thread into the 4mm nut, I chose a nice countersunk, stainless steel machine screw that fits flush in the taillight screw hole.  I had to cut the screw down, because the “guts” of the taillight (i.e., the circuit board) fit directly underneath the 4mm nut when the taillight is slid into place, and if the screw were to extend all the way through the nut, it would contact the circuit board and potentially cause problems.

And that’s it!  The taillight just slides into place over the bracket, and is held in by the single screw. It takes about 10 seconds to attach, with no fumbling.

One last finishing touch was to file the bottom of the lens to fit the contours of the fluted fenders.  The taillight was probably designed to fit smooth rounded fenders, and would have worked just fine as is, but by filing the lens plastic, it looks like it was designed for these fenders.

Next up will be the LED conversion of this NOS French headlight, which is just mock-fitted and non-functional in these photos:

I found a suitable “donor” LED headlamp, and am in the process of tearing it apart to figure out how best to carry out the retrofit into this headlamp shell.

Boston Globe in Praise of Vintage 3-Speeds

Sunday, May 30th, 2010

There is a nice article in the Boston Globe today about the local popularity of vintage 3-speeds. It mentions the Boston Retro Wheelmen, as well as other vintage bicycle resources in the area – including the Boston 3-Speed Club, Boston Tweed, Old Roads, Chic Cyclist, and Lovely Bicycle. Though I did not exactly say the quotes attributed to me in the manner they are phrased (I am not a part of “the slow movement” and I did not get a bike in order to “look good in the saddle”), I am pleased with the focus on vintage 3-speeds and with the recognition of their cultural significance in the Boston area.

En route to any of my daily destinations in Cambridge, Somerville, and Boston, I easily see dozens of vintage 3-speeds along the way. It never occurred to me that this was a special feature of our city, until I began to receive incredulous comments from readers in other parts of the country whenever I would post pictures of locally spotted 3-speeds. Why are there so many of them in Boston? Where are they coming from? These are questions I receive regularly from readers of Lovely Bicycle. I think the answer is in the history of Boston as both importer and manufacturer of bicycles for part of the 20th century, and I am hoping to post a well-researched article on this soon.

As for why so many people are buying and restoring vintage 3-speeds today? From my point of view, it is because they are simpler and more enjoyable to ride than most other bikes out there. This is a great secret that only a vintage 3-speed owner can know!

Conversion of a French road bike into a porteur: a preview

Thursday, May 27th, 2010

I’ve posted before (here and here) about various sub-projects related to my conversion of an old French road bike into a practical porteur.  Well, it’s nearly done and I thought I’d give a preview.  Here’s the bike, a 1972 Jeunet 630 road bike, in “before” condition:

What attracted me to the bike originally (beside the fact that it is my hard-to-find size) was its lightweight lugged steel frame and fork made from Reynolds 531 tubing, with somewhat relaxed angles and room for fenders, its lightweight aluminum and mostly French components, and its overall classic, French character.  I didn’t need another road bike, but I was intrigued by the versatility and style of the classic French porteur bikes, so I decided I’d attempt to convert it into one:  a bike that’s light, and therefore easy to carry up steps, one with adequate gearing to conquer the hills of Somerville, one with an upright riding position, one that can carry a bag of groceries or haul a box to the post office, and lastly–and most importantly–one that is comfortable, fun and stylish enough to be my daily rider.  I feel that the French porteur bikes, like the ones pictured below, integrate these features better than most bikes, and so it was that the porteur bike served as the template for my conversion:
1950’s Motobecane porteur.  Photo courtesy JP Weigle via Flickr.

Modern iteration of the porteur:  handmade in the US by Curt Goodrich.
Photo courtesy spoke sniffer via Flickr.
Here’s my Jeunet “after”, newly powder coated in a matte, minty green (RAL6021). I’ve assembled it well enough to ride, but by no means is it completed. It’s still missing lights (the subject of a prior post), and little things still need tweaking, like the brakes and the fender alignment.
Velo Orange, one of my favorite suppliers of classically styled bike parts and accessories, sell a beautifully crafted front porteur rack made from tubular stainless steel, taking all the design cues from the classic French constructeurs:

It’s large and versatile, with pannier loops, mounts for lights, an optional side rail, and a neat mount for securing an elongated front fender (typical of old French bikes), to avoid rattling.  I haven’t decided how I’m going to realize the utility of the rack– I can add a basket, a crate, or a side rail… or simply use a bungee net to secure stuff. For now I have a single pannier attached to it, a repurposed old leather school bag that just happens to snugly hold a 13″ MacBook. Perfect! And I have an old wine crate that I may affix to the rack… we’ll see.

Also from Velo Orange are the handlebars, shaped just like the classic French porteur bars:  similar to English 3-speed handlebars (commonly known as “North Road” bars), but slightly narrower and with less rise.  Actually, the French porteurs used to use the bars flipped the other way around, to achieve more drop, but I have them in the non-typical orientation, flipped up to provide a more upright riding position.

I’ll also use this photo to illustrate the French style “inverse” brake levers.  These are modern reproductions of old French brake levers.  The inverse design is ingenious, it makes you wonder why this design hasn’t become the de facto standard among city-style brake levers.  With the pivot point placed at the end of the bar, it allows your hand to rest anywhere along the bar from the bend on back, and still reach the brake lever!
Originally the Jeunet was geared like a typical road bike of that era:  10-speed, with a double chainring in front and a 5-speed freewheel in back.  The outer chainring was usually large, typically having over 50 teeth, allowing the bike to go fast.
The porteurs had simpler gearing, usually a single, smaller chainring in front, coupled to a 5-speed freewheel.  This provided plenty of gearing for getting around town, but didn’t allow the bike to quite reach road bike speeds.  Not having a derailleur also means being able to have a chainguard or chaincase– another common and practical accessory of old city bikes the globe over.  Since I wanted a simplified gearing setup and the potential to add a chainguard, I decided to convert the double chainring to a single, making the Jeunet a 5-speed in the spirit of the classic porteurs.
So next on the agenda is to complete the lighting.  These are the headlight casings that I intend to retrofit with modern battery-operated LEDs:
They’ll mount underneath the front rack, attached by bracket, similar to the ones in the Curt Goodrich example above.  I’ll make a step-by-step write-up of the LED conversion the topic of a future post.  Until then, if you’d like to learn more about porteur bikes with tons of photo examples, check out this link.  Here are some more pictures of the Jeunet porteur:

May 23 Historic Bike Tour: Lost Theatres of Somerville!

Wednesday, May 19th, 2010

The Somerville Bicycle Committee and the Somerville Historic Preservation Commission are sponsoring an 8-mile ride through Somerville this Sunday to visit the sites of former movie theatres, some long gone, some converted for other use.  If you’re an architectural history buff, or simply want to enjoy a ride through the ‘ville with some other local riders, this sounds like fun!  I hope to see you there!

From the official announcement:

9th Annual Somerville History Bike Tour: Lost Theatres of Somerville

Sunday May 23, 2010, meeting at 1pm (leaving promptly at 1:15pm) in front of the Somerville City Hall (93 Highland Ave), and riding for about 8 miles.

This  year’s theme is “Lost Theatres of Somerville”. We’ll visit the locations of Somerville’s former movie theatres, many of which are still standing and converted to other uses. Our tour will be based on David Guss’s recent Somerville Museum exhibit and website of the same name. 

In the event of steady rain, we’ll postpone the ride to Sunday, June 13. 

Information about the lost theaters of Somerville can be found on David Guss’s website, the Somerville Museum’s website and at CinemaTreasures.com

A link to a map showing where all the theaters were located is here

Sponsored by the Somerville Bicycle Committee and the Somerville Historic Preservation Commission
A donation is requested to support the Historic Preservation Commission’s activities. 


Retrofitting a vintage bicycle taillight with a modern LED

Thursday, May 13th, 2010

Among my favorite aspects of vintage bikes are the little accessories: the small period details designed into the peripheral parts such as chain guards, racks, fenders, and lighting fixtures. Like clothing accessories or room decor, these peripheral pieces combine to “tie together” the overall aesthetic (to paraphrase Jeff Bridges in The Big Lebowski). So when I embarked on my latest project, the conversion of an old French road bike into a porteur (the subject of a future post–it’s being built up as I write this), I began studying the finer details of the classic French bikes. What struck me was the simple, streamlined beauty of their lighting systems, particularly the headlights and taillights. Here’s a nice example of a 1950’s René Herse porteur, displaying so many of the wonderful little touches that made these bikes so beautiful:

Photo courtesy of Flickr user spoke sniffer

Let’s zoom in on the taillight:

There is no bulbuous plastic housing or any part of this light that looks bulky or intrusive.  Unlike modern taillights, this one is trim, compact, and mirrors the smooth curvature of the fender.  Unfortunately for me, all these wonderful, old gems of lighting accessories were designed to hold regular incandescent bulbs, powered by a dynamo. Since I have no intention of incorporating dynamo lighting in my porteur conversion, I wondered whether I could retrofit a modern battery-powered LED into once of these nice old housings.  Fortunately there is precedent for this type of undertaking, which I discovered from perusing this Flickr set of Vélocia, a fellow vintage bike enthusiast and DIYer. Vélocia took the housing and lens of an old Soubitez Catalux 6 taillight and retrofitted the LED mechanism from a Planet Bike Superflash.  What a great idea, and in one important way, an improvement on the original: the LED is undoubtedly brighter than the original 0.6W bulb!

Fortunately, vintage French bike parts are rather abundant on online auction sites, and I was lucky enough to find a NOS Soubitez taillight shell and lens on eBay, identical to the one on the René Herse example above.  Inspired by Vélocia‘s conversion, I set out to retrofit the shell with a modern LED. Here’s how I did it:

First, I needed to find an LED taillight small enough to re-package inside this petite housing.  Fortunately, Sigma makes a nice small single LED taillight called the Micro, shown here next to the Soubitez fixture:

Next, I needed to remove the LED circuit board and see how it would fit inside the Soubitez housing.  Would it fit?  No!

I needed to do some surgery on the circuit board to make it fit.  And that was not the only challenge.  I also needed to remove the built-in tact switch (the part of the circuit that you press, and which gives that tactfully delightful popping sound when you press it, hence the name, “tact” switch).  It’s that round disc in the center of the circuit board.  In its place, I soldered two short leads, the other ends of which I soldered onto a remote tact switch mounted on the housing.  Radio Shack sells these, .99 for a four-pack!  Good thing, because they’re so small I lost two of them already!
Here’s the circuit board with the tact switch removed.  Conveniently, the Soubitez housing has a small notch cut out of its side, presumably for a switch or perhaps a dynamo wire.  Whatever the intended purpose of that notch, it’s a suitable location for a remote tact switch:

After surgical trimming of the circuit board with a rotary tool grinding wheel and soldering the leads from the circuit board to the remote tact switch, the switch was glued into place. The circuit board holds a button-type battery on the other side and couldn’t be glued in place, else the battery would not be accessible for replacement.  Fortunately, the circuit board fits snugly enough without glue, and can be tilted out of the housing to access the battery.  When the fixture is mounted to the fender, the fender will hold the circuit board in place.  The whole circuit board and soldered leads were covered with a thick layer of clear rubber adhesive, so there’s no chance of shorting out if contacted by the fender.

The finished product (note the tact switch unobtrusively peeking through):

All that’s left is to figure out how to mount this baby on the fender– the subject of a future post!