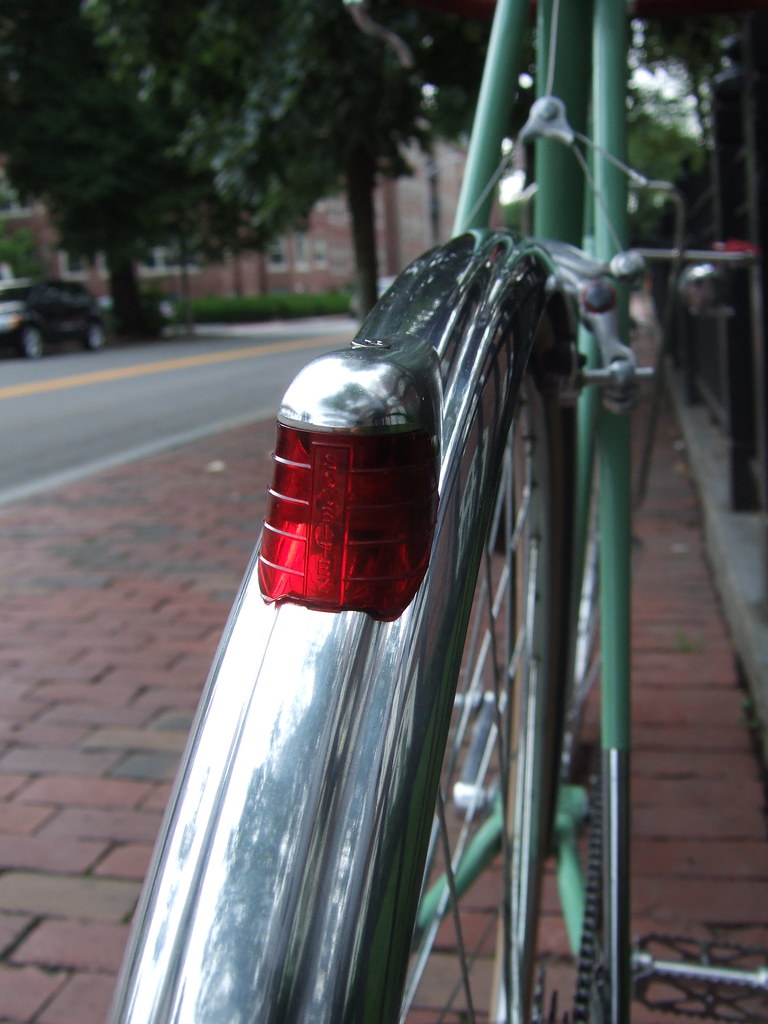
In an earlier post, I documented the retrofitting of a vintage French bicycle taillight with a modern battery-powered LED. In that post, I hadn’t yet developed a solution for mounting the customized taillight to the fender. This post documents this final step, and shows the final product.
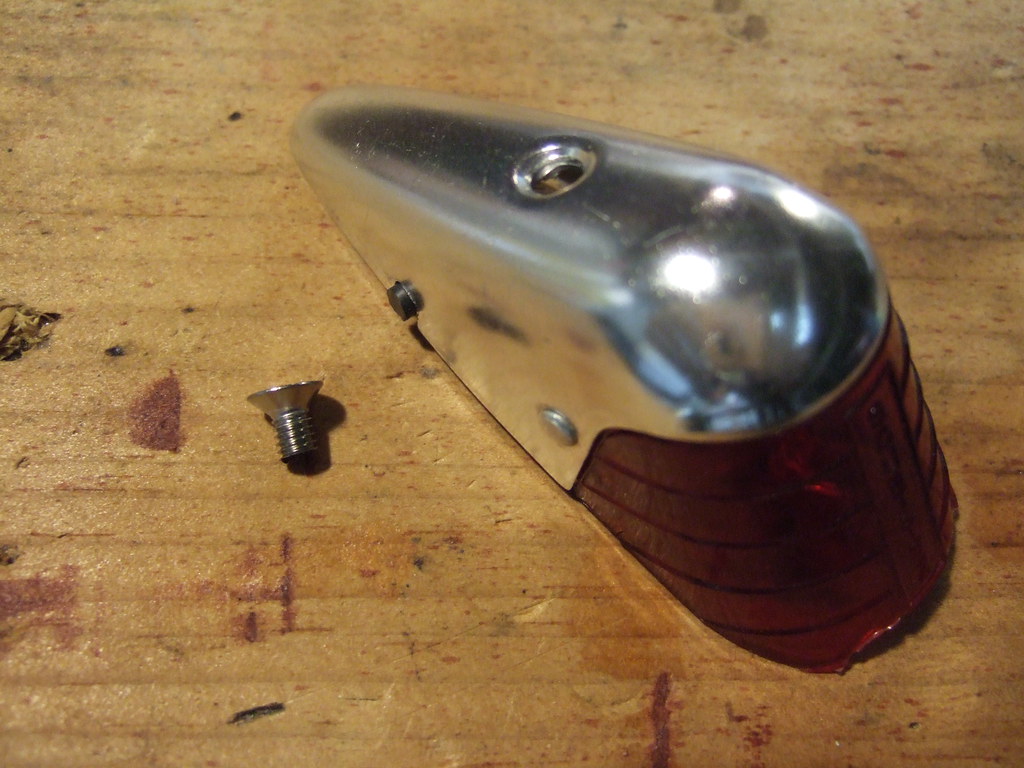
The 1950s Soubitez taillight shell has a single hole for mounting to an internal support assembly, which itself mounts onto the fender. That assembly was missing from my taillight, and I would have had to remove it anyway for the LED retrofit. So, I had to fabricate a small bracket, one end of which would attach to the fender, the other end of which would attach to the taillight via the provided screw hole. The bracket had to be small, yet strong, to prevent the taillight from wobbling. An added challenge was making the taillight easy to remove and re-attach for battery replacement.
For the bracket, I chose a small tang of hardened stainless steel. This originally came with a set of SKS fenders that I purchased for one of my road bikes (another future post), but I knew I wouldn’t need it for that project, so I hacked it to work as the taillight mounting bracket. It is very strong and does not easily bend:

On the taillight end of the bracket, I glued on a 4mm stainless steel nut. This was essential for being able to screw the taillight onto the bracket, since the bracket is completely concealed inside the taillight.
To thread into the 4mm nut, I chose a nice countersunk, stainless steel machine screw that fits flush in the taillight screw hole. I had to cut the screw down, because the “guts” of the taillight (i.e., the circuit board) fit directly underneath the 4mm nut when the taillight is slid into place, and if the screw were to extend all the way through the nut, it would contact the circuit board and potentially cause problems.
And that’s it! The taillight just slides into place over the bracket, and is held in by the single screw. It takes about 10 seconds to attach, with no fumbling.
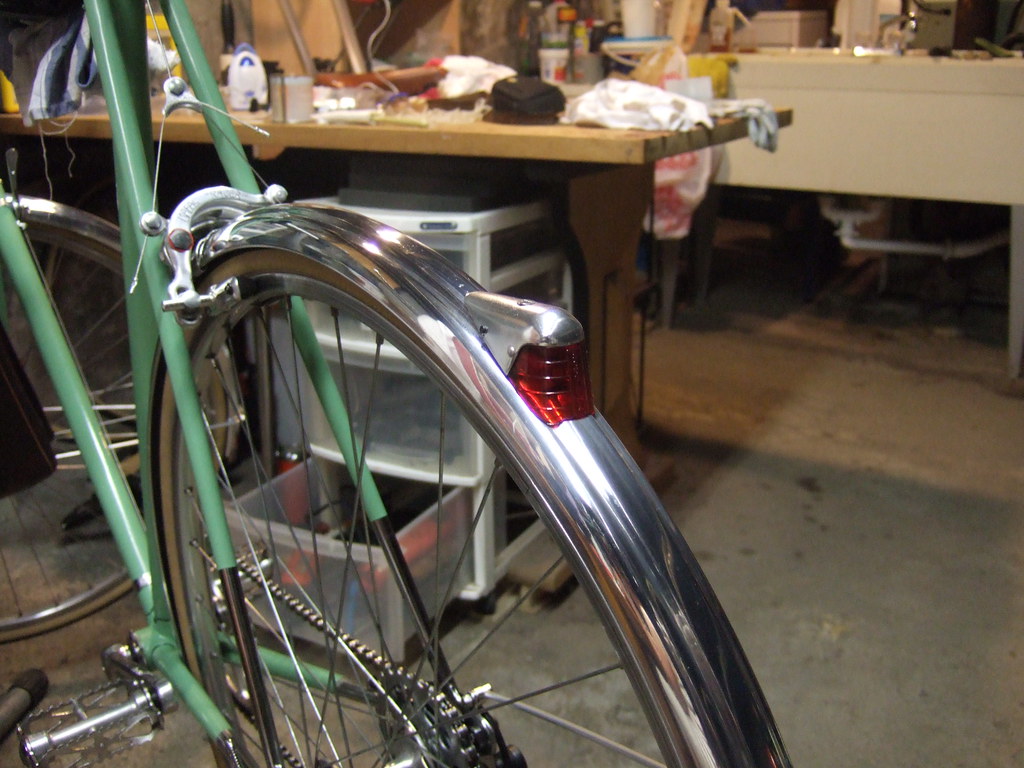
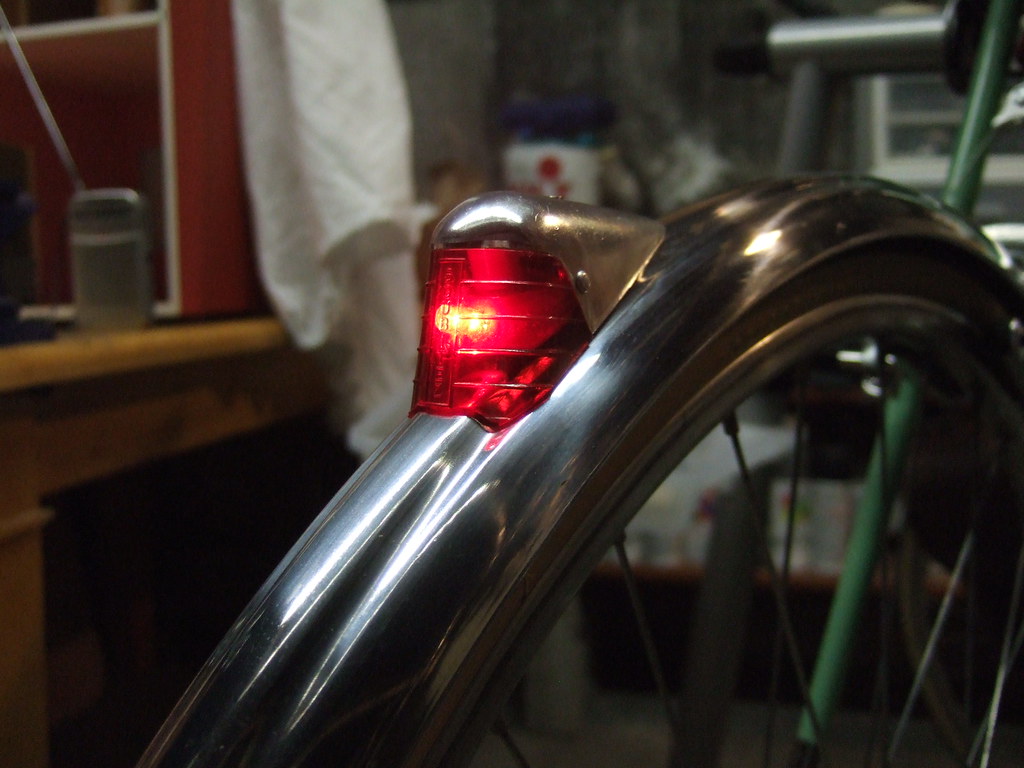
One last finishing touch was to file the bottom of the lens to fit the contours of the fluted fenders. The taillight was probably designed to fit smooth rounded fenders, and would have worked just fine as is, but by filing the lens plastic, it looks like it was designed for these fenders.

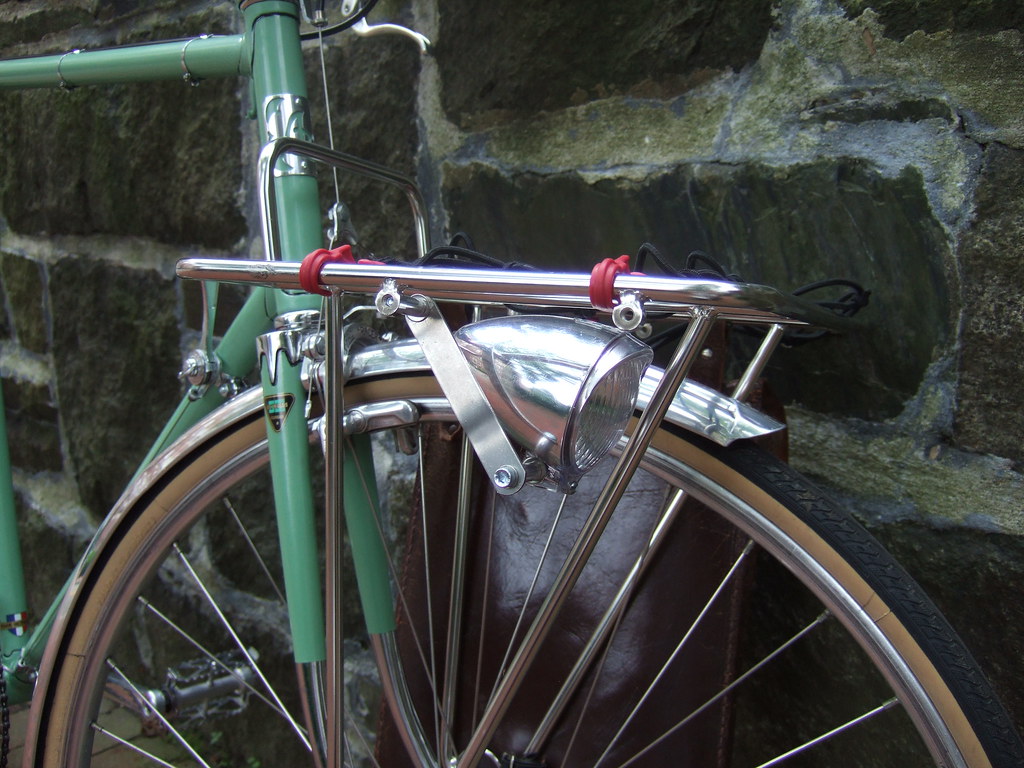
Next up will be the LED conversion of this NOS French headlight, which is just mock-fitted and non-functional in these photos: