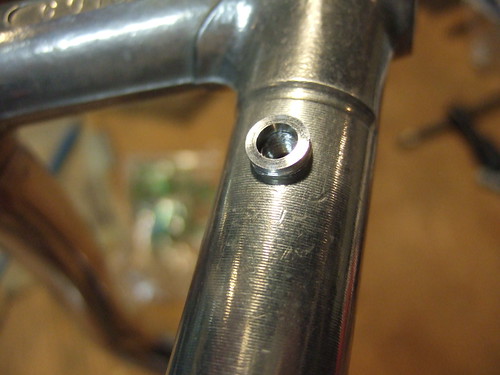
One of the things I love about old French bikes–especially the constructeur bikes–is the attention that was paid to small details. The better constructeurs saw to it that every part of the bike fit in harmony with the rest of the bike. This mindset was applied even to minor details such as the bell: an optimal location on the stem was chosen (usually on the side, near the headset), and a hole was tapped directly into the stem. The bell was then threaded into the stem. Elegant, with no clamp to mar the clean flow of the stem.
Today, most bike builders would cringe at the idea of tapping a hole in a Nitto stem, for fear of weakening a structurally important part of the bike. But this is actually a misconception, as most stem failures occur at the handlebar clamp, the weakest part of the stem. The stem is strongest where most people would want to mount a bell, so drilling a hole should have little if any effect on the stem’s overall strength. That said, most people are content with having their bells mounted via a clamp or bracket. Almost all bells sold today come with a basic clamp to attach to the handlebar or stem, and this is what I used to mount a brass bell on one of my bikes. But I can’t stop thinking that the clamp looks disruptive; it keeps catching my eye. The folks at Velo-Orange apparently felt the same way, so they designed a very nice bracket to eliminate the need for an unsightly clamp, and I used this bracket on another one of my bikes. I think it looks quite nice. Velo-Orange also sells a headset spacer with a hole threaded for a bell, another alternative to the clamp, and even more elegant than the bracket solution. The biggest caveat to the spacer is that it is not compatible with all bikes. In fact, not one of my bikes can accommodate it.
Since I’m in the middle of building up an old French bike and will be adding a bell, the idea kept nagging me: should I drill into my stem? Well, in the spirit of the old constructeurs, it didn’t take long to convince myself that that’s how I would proceed. Herein I describe this deceptively easy process.
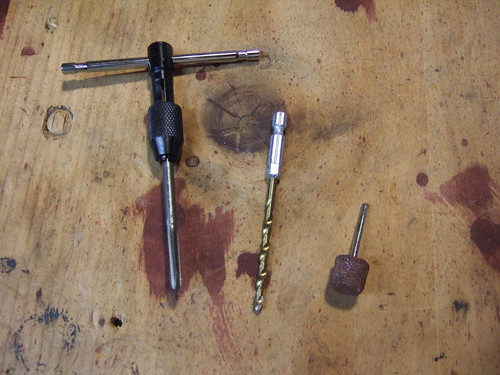
First, you need to buy a bell that comes with a 5mm threaded post. Any of the Japanese brass bells that you purchase from Velo Orange or Jitensha studio will work just fine. Next, assuming you already have a drill, you will need a 5/32″ drill bit and a 5mm x 0.8mm pitch tap, as well as a tap “driver” (basically a handle that holds the tap). These can be purchased at any decent hardware store, and you shouldn’t be set back more than for everything. I already had the drill bit and tap driver, so I only had to buy the 5mm tap, which cost less than . Optionally, you also need a small rotary tool grinding wheel for a minor step which I will describe later… but honestly, you can do without it.
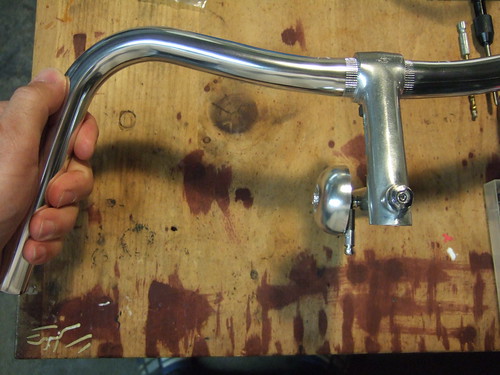
First step is to determine where you want to mount the bell. Note how far the stem is inserted into the headset, since mounting the bell too low may restrict proper insertion of the stem. The rest is simply an aesthetic determination. Do you want the bell high up on the stem? In the middle? Or do you want the bell resting horizontally up on top of the stem, near the handlebar clamp?
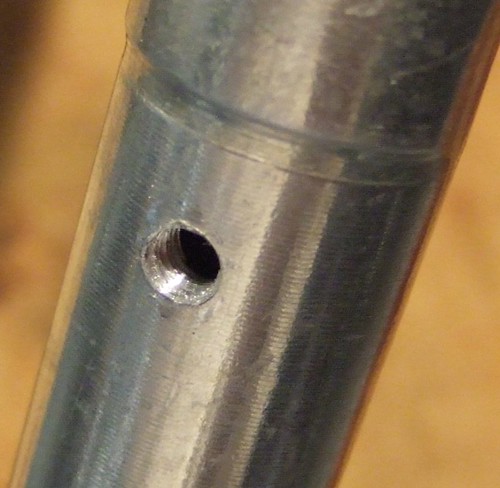
Next, carefully drill the hole using the 5/32″ drill bit. When drilling, be sure to hold the drill at perfect right angles to the stem. This can be tricky if you are drilling into a cylindrical surface, so try to use several points of reference to make sure the hole is drilled symmetrically to the stem. Otherwise, the bell will attach at an odd angle and look crooked. Drill until you reach the hollow section of the stem.
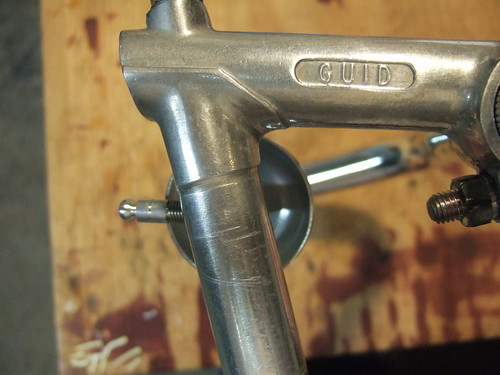
After drilling the hole, insert the tap. The tap is tapered at the end, and gradually flares out as you slowly thread it into the hole and it cuts into the aluminum. Just like the drilling step, make sure as you turn the driver that you keep the tap at perfect right angles as you thread it into the hole. You will feel slight resistance as the tap cuts the threads into the aluminum. Once the tap reaches the end of the hole, the resistance will cease and it will begin to feel like you are simply threading in a screw. This means you are finished! Unthread the tap, and you will have a perfect 5mm threaded hole. Blow out any aluminum flakes that may get left behind inside the stem.
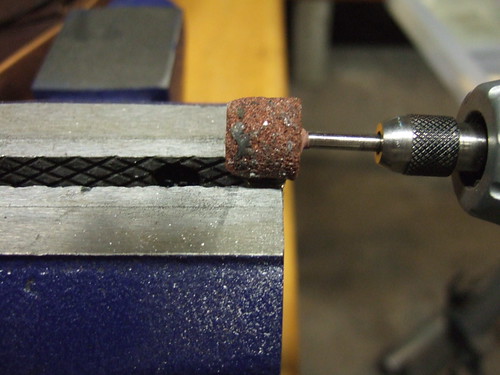
Next comes the optional step. If drilling into a curved portion of the stem, as is typical, it is desirable (but by no means necessary) to create a small spacer with a concave surface on one side to mate flush against the convex stem. The Japanese bells from VO and Jitensha come with a small spacer with which to make this minor modification. Theoretically, doing this makes the contact surface between the spacer and stem more uniform, and therefore the attachment more solid. But practically speaking, it’s really just one of those annoying little details, which of course, my OCD tendencies compelled me to address. This is where the small grinding wheel comes in. Place the spacer in a vise or grip tightly with a pair of pliers, such that one side is exposed. Using the grinding wheel, grind away a small, centered concave “valley”:


